
CASTING DIRECTORS: How Do I Manage My Film & TV Casting Workflow on Casting Networks?
Welcome! This guide is designed to help Casting Directors navigate the full end-to-end workflow for Film and TV projects on Casting Networks. Whether you're just getting started with your first project or looking for a quick refresher on tools like self-tapes and session management, this article covers the key steps from login to final review — all in one place.
Log In and Get Started
To access your Casting Networks account, head to castingnetworks.com and enter your email and password. If you've forgotten your credentials, use the "Forgot Password" link on the login page to reset them.
Once logged in, you'll land on your dashboard where you can access all of your active projects, recent submissions, and account settings. From here, everything you need to run your casting workflow is just a click away.
Find out more about logging in and Google SSO Here.
Create a Project and Add Roles
To start a new casting project, navigate to the Projects section and select Create New Project. You'll be prompted to fill in key details like the project title, type (Film, TV, etc.), and production information.
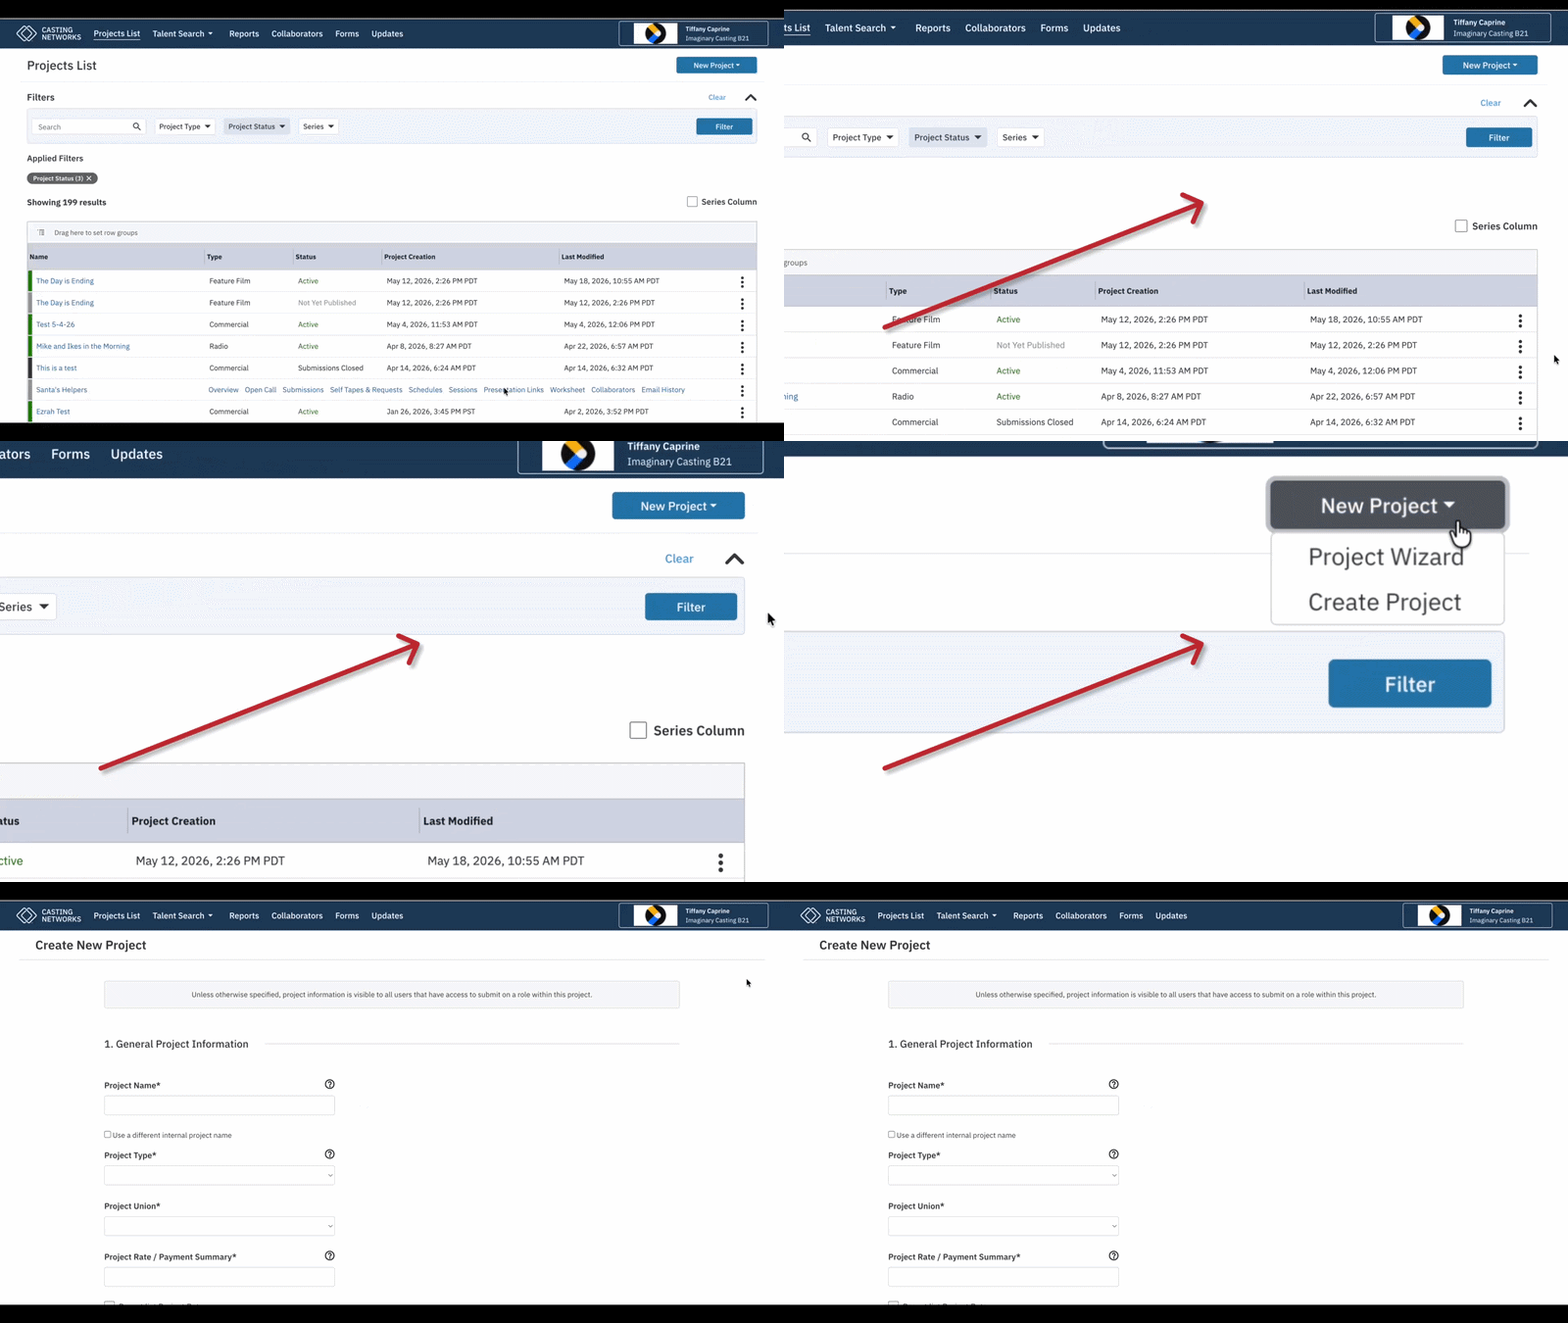
Once your project is created, you can add individual roles by selecting Add Role within the project. For each role, you'll enter the character name, breakdown description, age range, and any other relevant specs. You can add as many roles as your project requires.
Post a Breakdown / Publishing
After your roles are set up, you're ready to post your breakdown. You'll have options to control who can see and submit to your breakdown — including filtering by talent type, union status, location, and more.
Once you're happy with your settings, hit Publish to make the breakdown live. Talent and their representatives will be able to find and submit to your project based on the parameters you've set.
Get Submissions and Review Talent
Submissions will start coming in once your breakdown is live. Head to the Submissions tab within your project to view all incoming talent. You can sort and filter by role, submission date, or other criteria to find exactly who you're looking for.
From the submissions view, you can review talent profiles, watch reels, and use the rating tools to mark talent as Consider, Hold, or Pass. This keeps your review process organized and easy to track as submissions grow.
Request Self-Tapes
To request a self-tape from a talent, select them from your submissions list and choose Request Self-Tape. You'll be able to add custom sides, instructions, and a due date before sending the request directly through the platform.
Talent will receive a notification with all the details they need to record and submit their self-tape. Once submitted, you'll find their tape in the Self-Tapes section of your project, ready for review alongside their profile. See how to create requests here.
Scheduling
When you're ready to bring talent in for an in-person or virtual audition, use the Scheduling tool to set up your audition slots. You can create time blocks, assign talent to specific slots, and send out appointment notifications — all from within the project.
Talent will receive their scheduled time via email and can confirm or request a change directly through the platform, keeping your calendar tidy and communication in one place.
To learn more about scheduling Auditions click here.
Manage Sessions and Audition Media
The Sessions feature lets you organize your audition footage and notes in one central location. You can create sessions by project and role, add media, and leave notes on talent performances for easy reference during your decision-making process.
During live auditions, you can capture notes in real time, flag favorites, and update talent status without ever leaving the session view. It's your all-in-one workspace for managing the room — whether you're in person or remote.
To see more on Creating and Managing Sessions Click here.
Copy to Cast It
If you use Cast It as part of your workflow, you can push talent and project data directly from Casting Networks using the Copy to Cast It feature. Select the talent or project you want to transfer and follow the prompts to sync the information over.
This integration keeps your Cast It workspace up to date without manual re-entry, saving you time and reducing the chance of errors across platforms. See step-by-step instructions here.
Send Links Through Cast It
Once your project data is in Cast It, you can use the Send Links feature to share audition footage, session files, or talent profiles with producers, directors, or other decision-makers. Simply select the content you want to share and generate a shareable link - see how to here.
Recipients don't need a Casting Networks account to view shared content — they'll receive a secure link that gives them access to exactly what you've shared, and nothing more.
Worksheet Overview
The Worksheet is your master list for tracking talent across all roles and stages of your project. It gives you a bird's-eye view of where each person stands — from initial submission through callback, offer, and booking.
You can customize columns, update statuses in bulk, and export the worksheet for use in production meetings or external reports. It's the best way to keep your entire team aligned on where casting stands at any given moment.