
CASTING DIRECTORS: How do I add a Role to a Project?
This article is for Casting Directors using Casting Networks. It explains how to add a new role to a project, including each field and section you will encounter during the process. Whether you are building out a new project or expanding an existing one, this guide will help you get your roles set up correctly.

Adding a New Role
Each role has its own breakdown and requirements. You can add multiple roles to a single project, and each role can be published independently to different audiences.
You can add a role to a project at any time, even after the project has been published. New roles can be published immediately or kept internal until you are ready to release them.
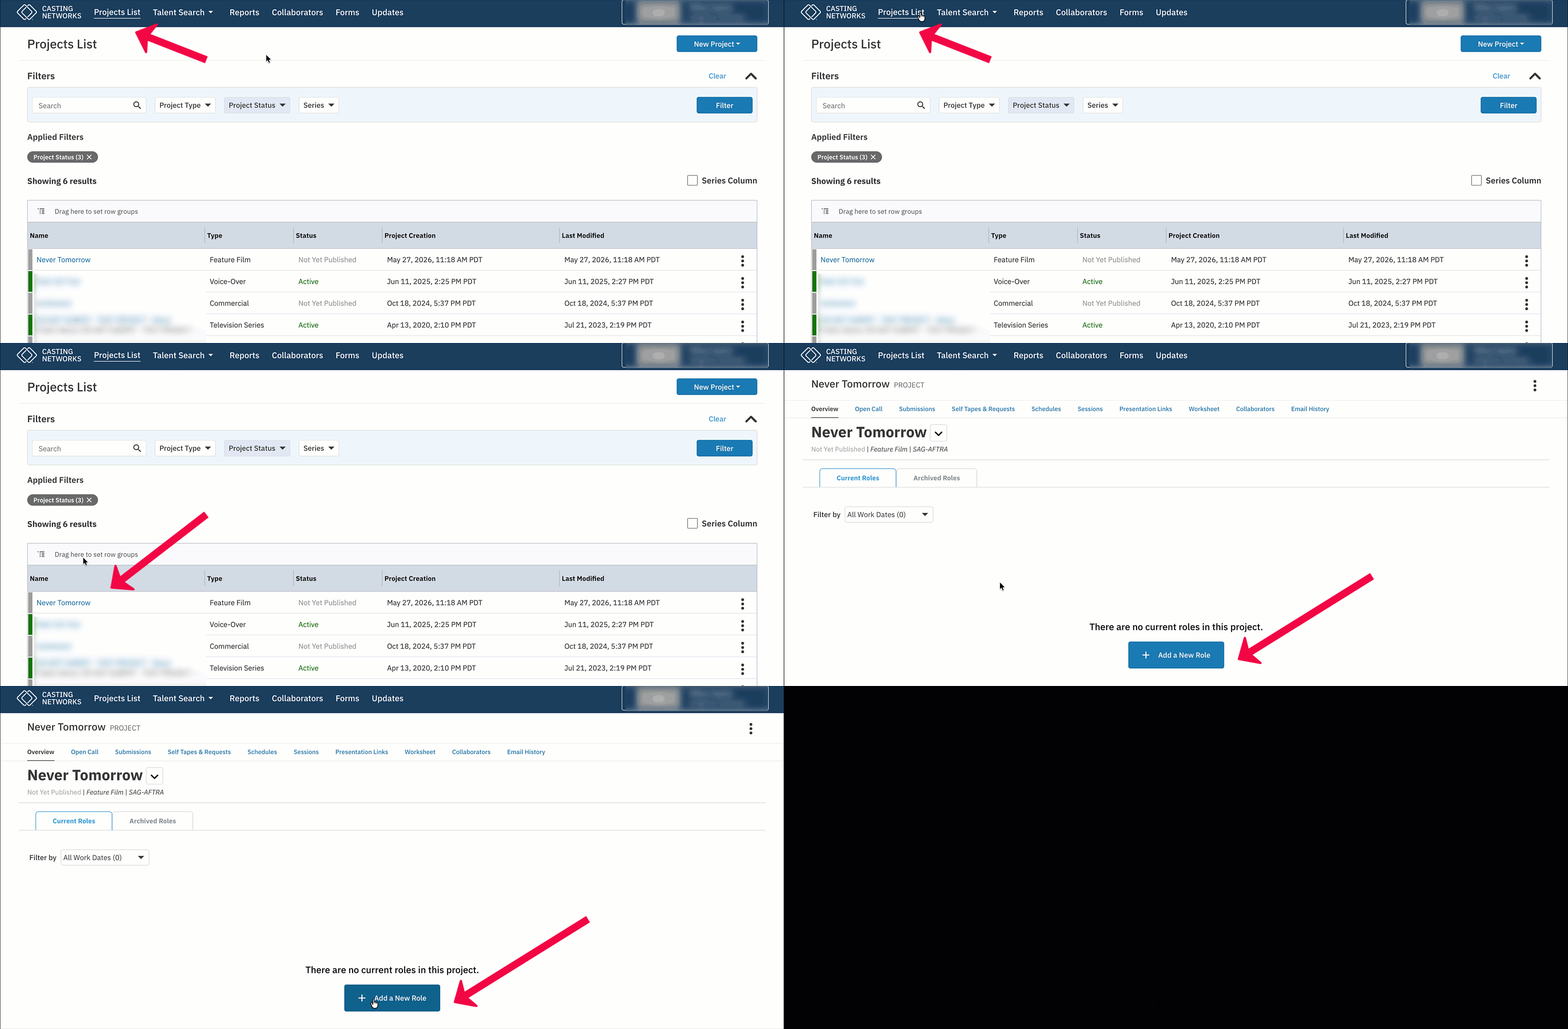
Navigate to your Project List by selecting Project List in the top navigation bar.
Click on the project title where you want to add a role.
Once inside the project, click +Add a New Role.
The role creation form will open. Fill out the sections below, then save your role.
General Role Information
This section establishes the basic details of the role.
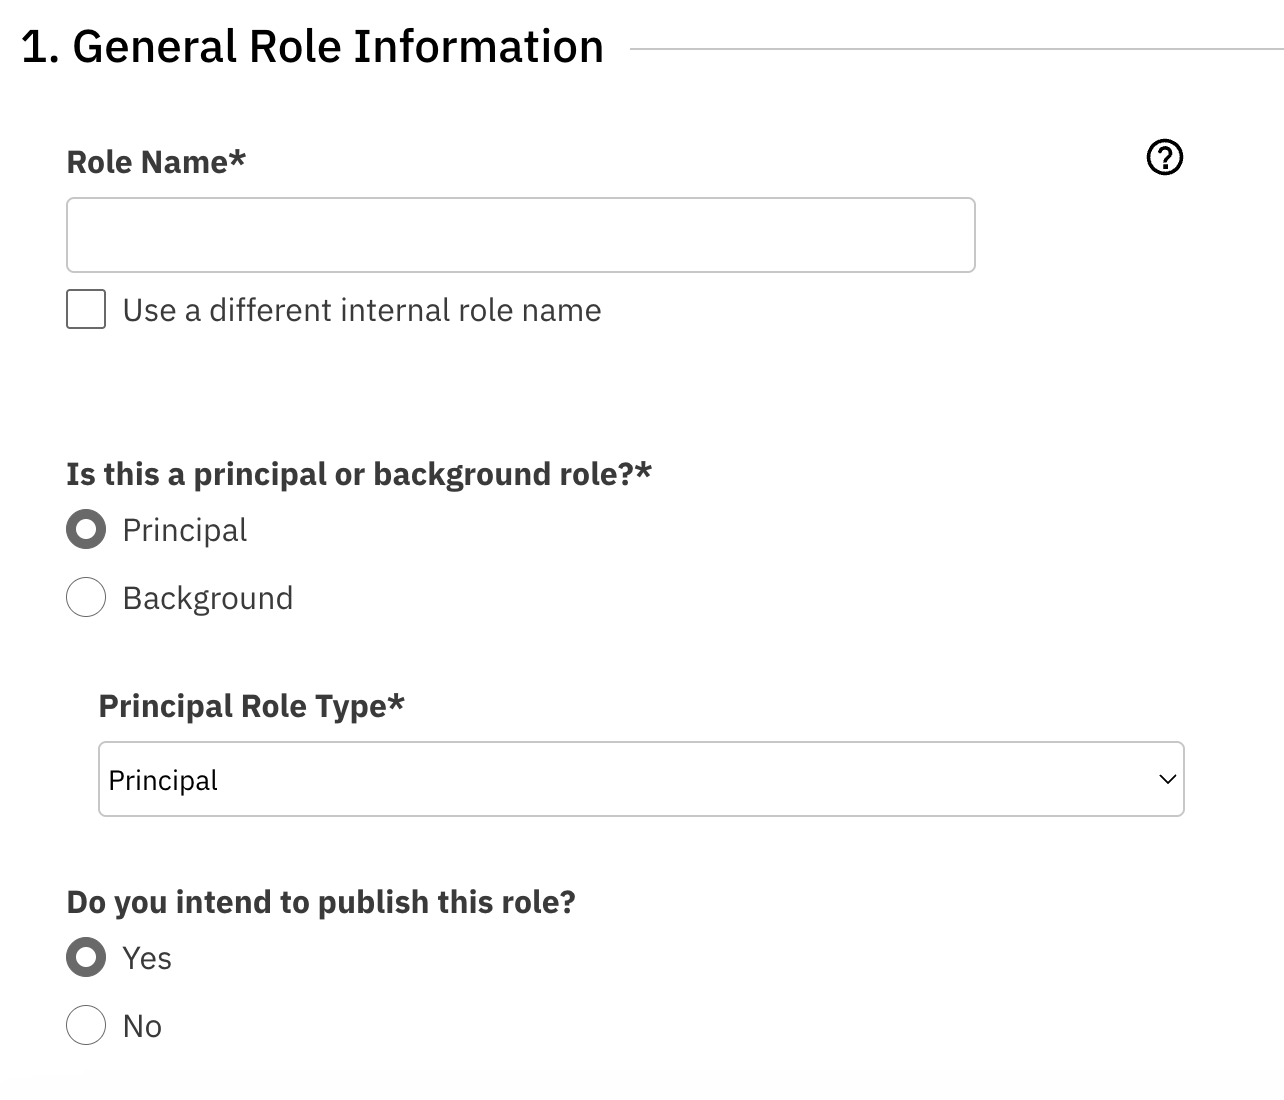
Role Name - Enter the character name or role identifier - this is required to add a role. This will be visible to talent and representatives once published. If you wish to use a Working Role name, enter this here and select the check box next to Use a different internal role name, you will then be required to enter an internal role name.
Role Type - Select if the role is Principal or Background. Then select the additional role type from the dropdown (for example, Principal, Supporting, Featured Background, etc.). If you are adding Background roles you will also be required to select the union status for the role.
Intention to Publish - Select if you intend to publish the role or keep it internal. By default this is set to YES.
Keep in mind - No publication occurs here. Actual publication happens when you choose to publish from the main project overview page. Think of this section as setting your preferences ahead of time so everything is ready to go when you are.
Role Rate
This is where you can add additional pay or contract details specific to the role you are creating. Enter the specific rate for this role as this may differ from the project-level rate.
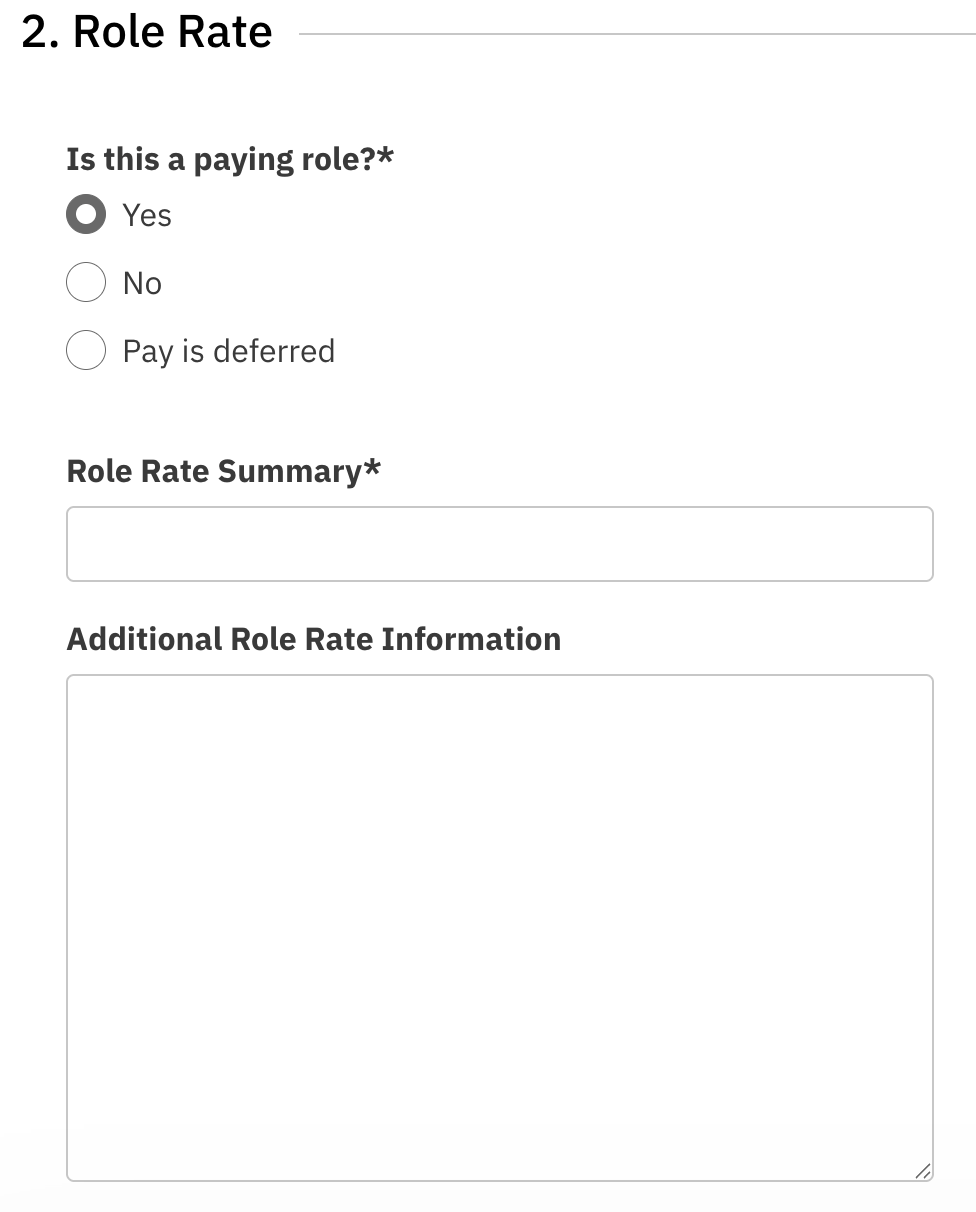
Paying or Not - Select whether the specific role is a paid role or non paid. If the pay is dependent on the revenue of the project or paid out after the project is aired, you can select Pay is deferred.
Role Rate Summary - Enter the rate or payment information for this role. You can list this as the Scale or a minimum base rate. This field is required to complete the project set up
Additional Role Rate - This is an optional field where you can add any additional role rate information that you wish to include.
Demographic Features
This section defines the talent parameters for the role. These parameters help representatives filter their roster to find talent that are right for this role.
If releasing to the Casting Billboard, this criteria determines which talent are alerted and prompted to submit.
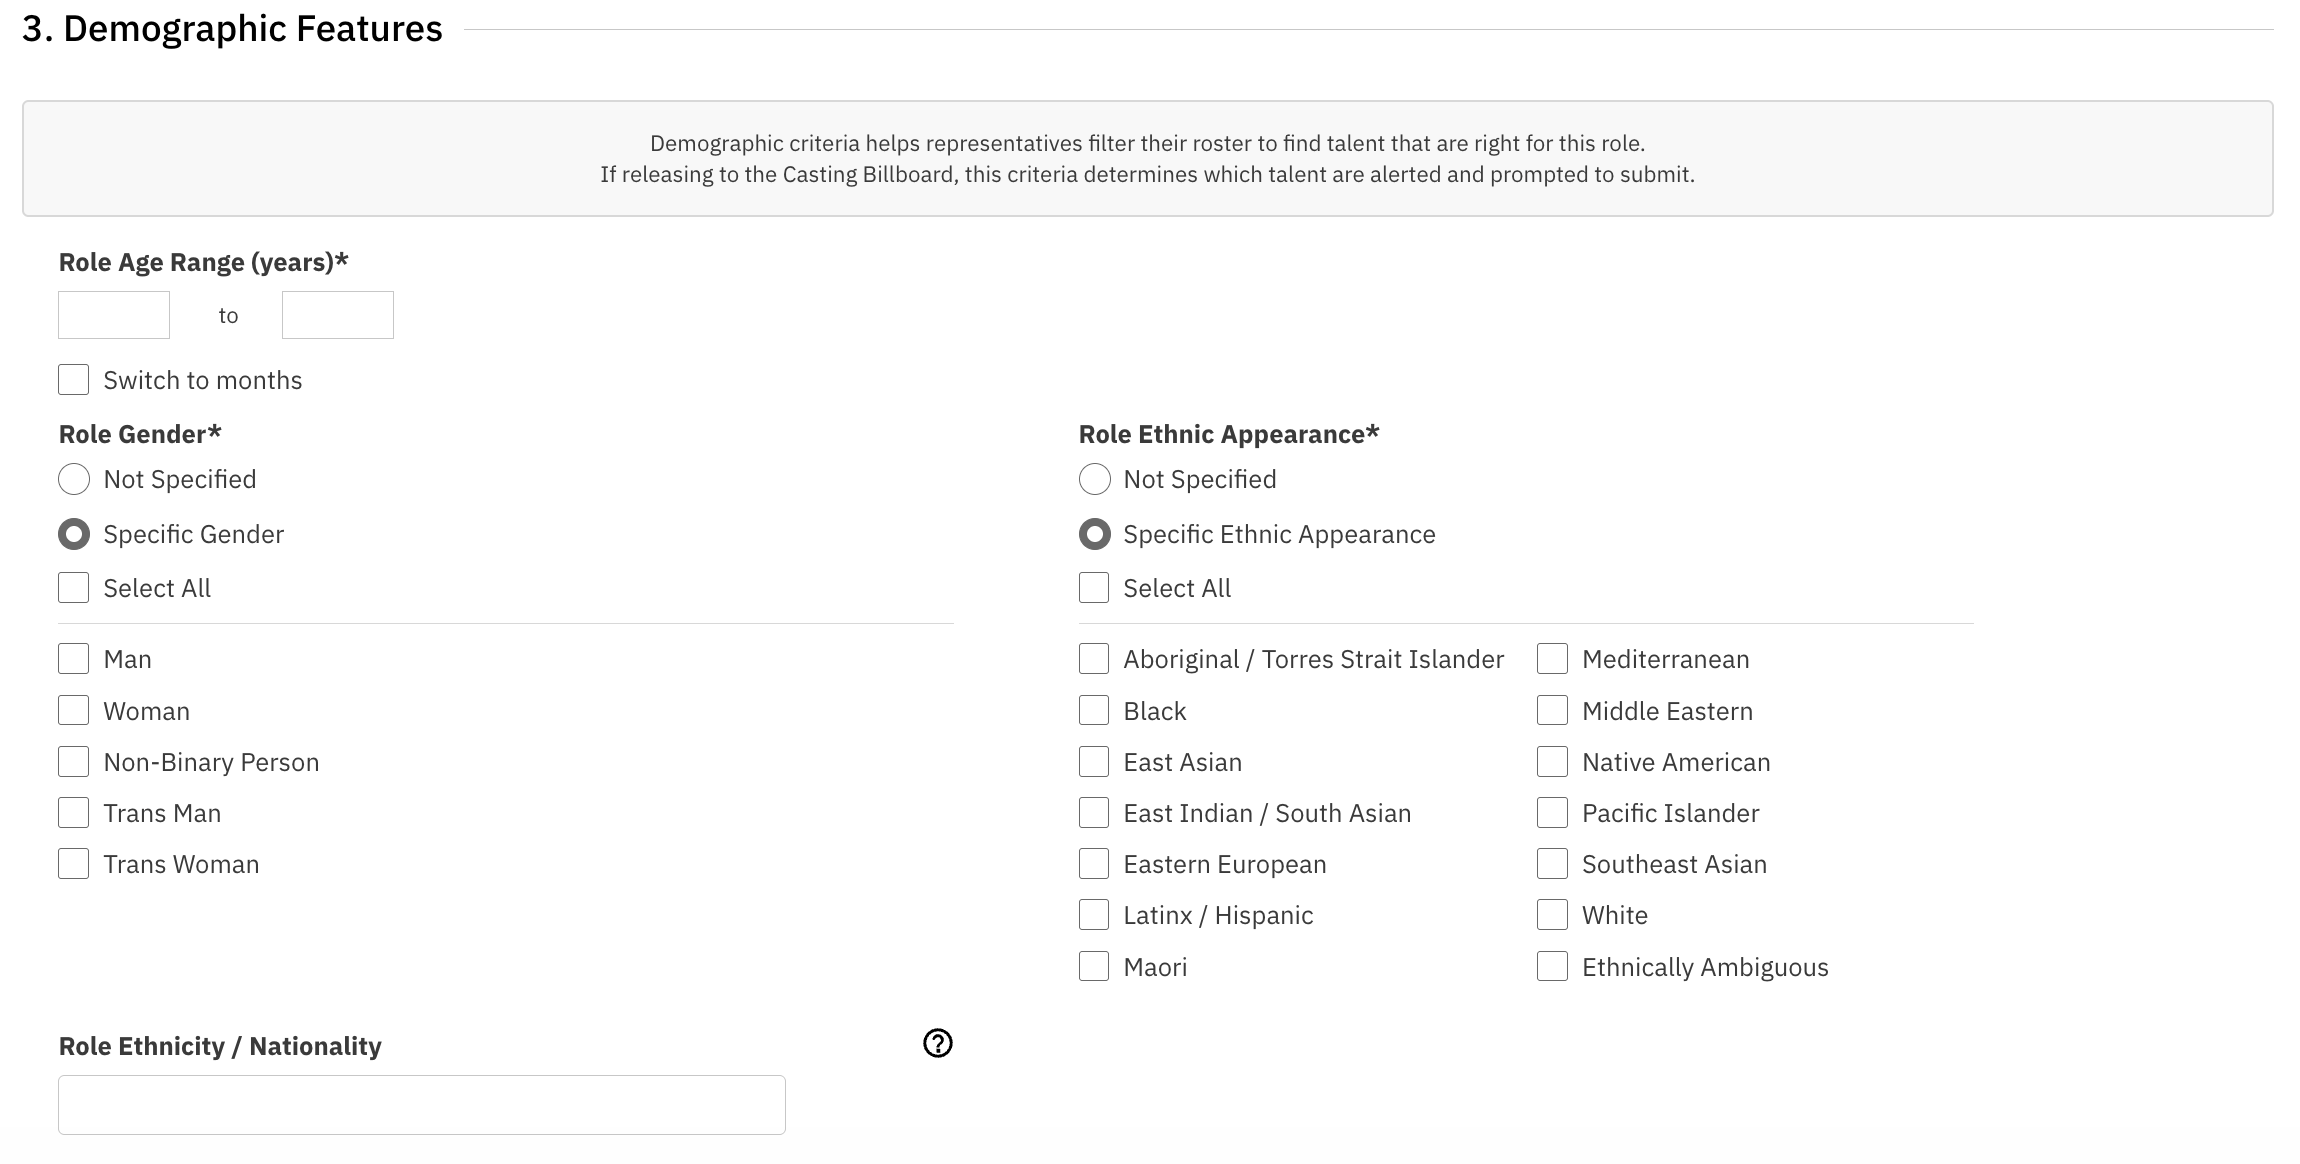
Role Age Range - Set the minimum and maximum portrayable age range for the role. We suggest a maximum of a 10 year age gap to help refine your submissions.
Role Gender - Select the portrayable gender for the role, if applicable. You must select at least one option under this section and can select multiple if needed.
Role Ethnic Appearance - Select any ethnicity specifications, if applicable. You must select at least one option under this section and can select multiple if needed.
Role Ethnicity/Nationality - This is an optional field where you can specify specific portrayable nationality or heritage pertinent for the role.
Role Description
This section is where you describe the role and upload any supporting materials.
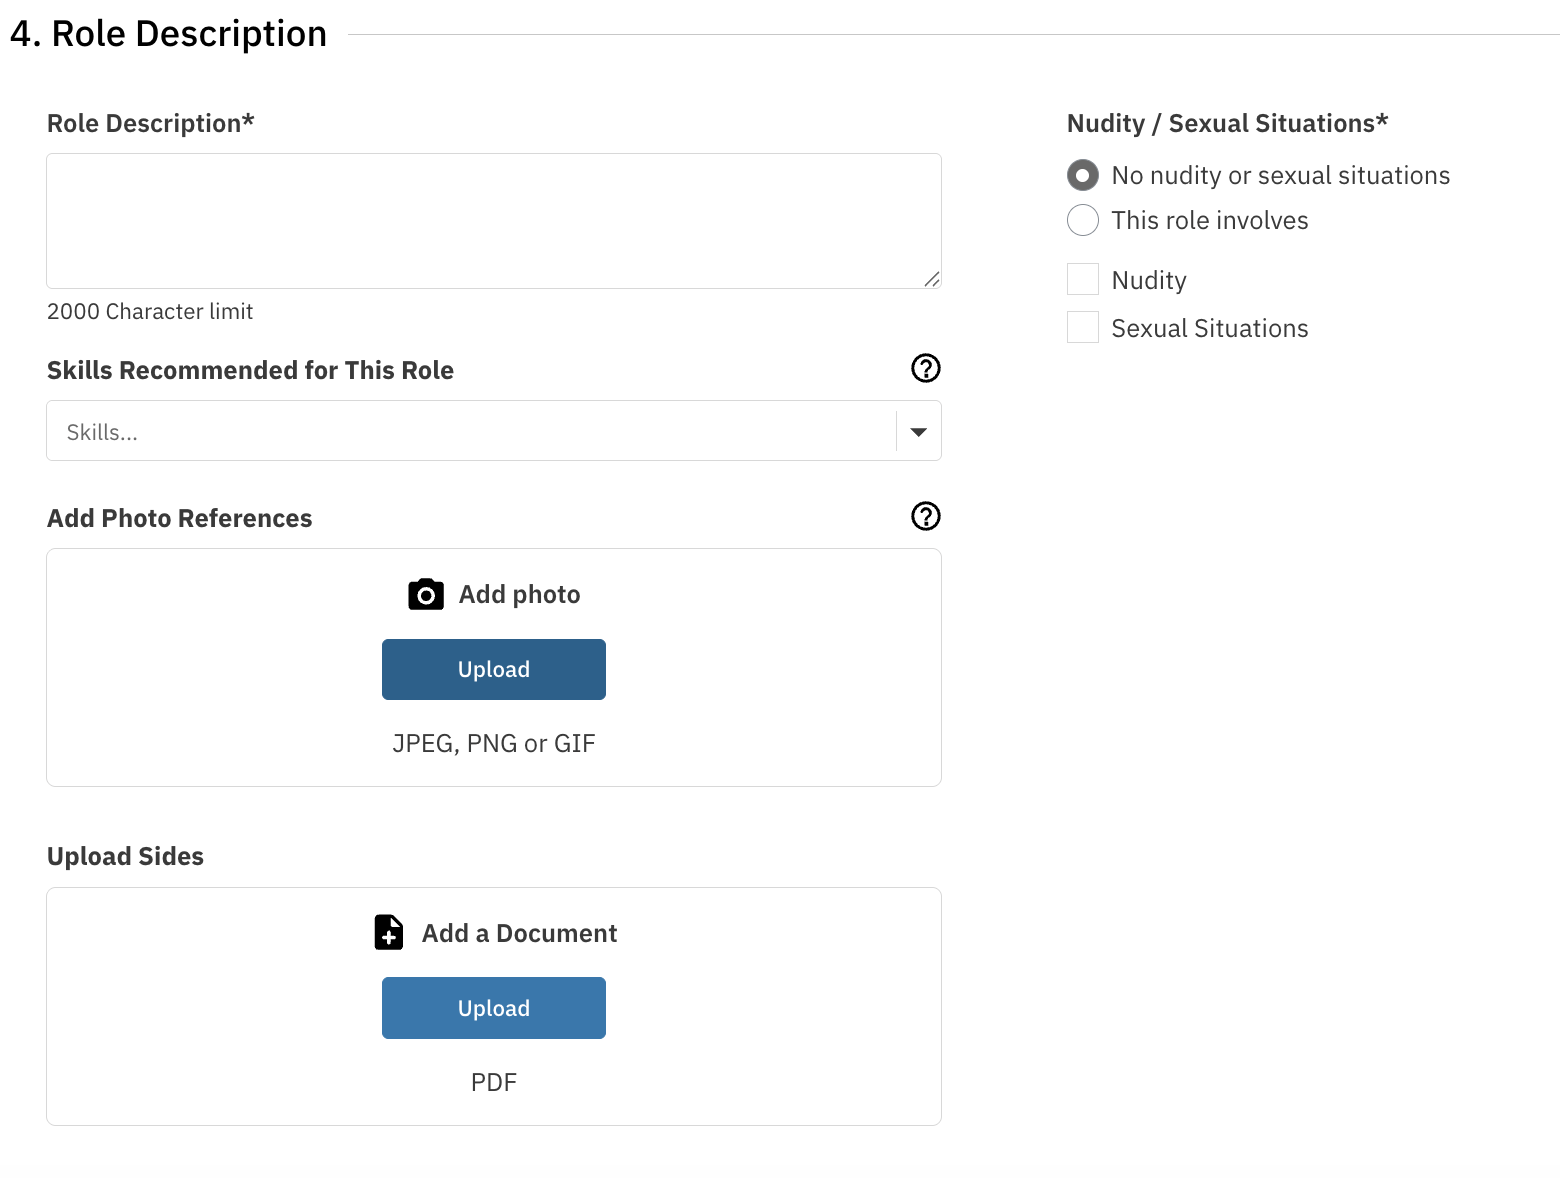
Role Description - Enter a detailed breakdown of the character, including personality traits, physical attributes, story context, and any other relevant details.
Add Skills - This field is optional. Add specific skills required for this role (for example, ballet, horseback riding, fluency in a language).
Photo Reference - If you have image references for this role, you can add them here. Files must be in JPEG, PNG, or GIF format.
Upload Sides - If you have specific sides or audition materials for this role you can include them here. Files must be in PDF format. You also have the ability to choose whether sides are visible on the Casting Billboard, visible only to Representatives, or only available within Requests or Schedules.
Nudity / Sexual Situations - This is defaulted to No nudity or Sexual Situations. If the role does have either of these, it is best to define these here. Once selected you will be required to add additional context.
Audition Information
This section sets the audition details for the role. This will be auto populated with the Audition information added on the project level. If a role has specific dates that differ from the information posted on the project level, you can add this here.
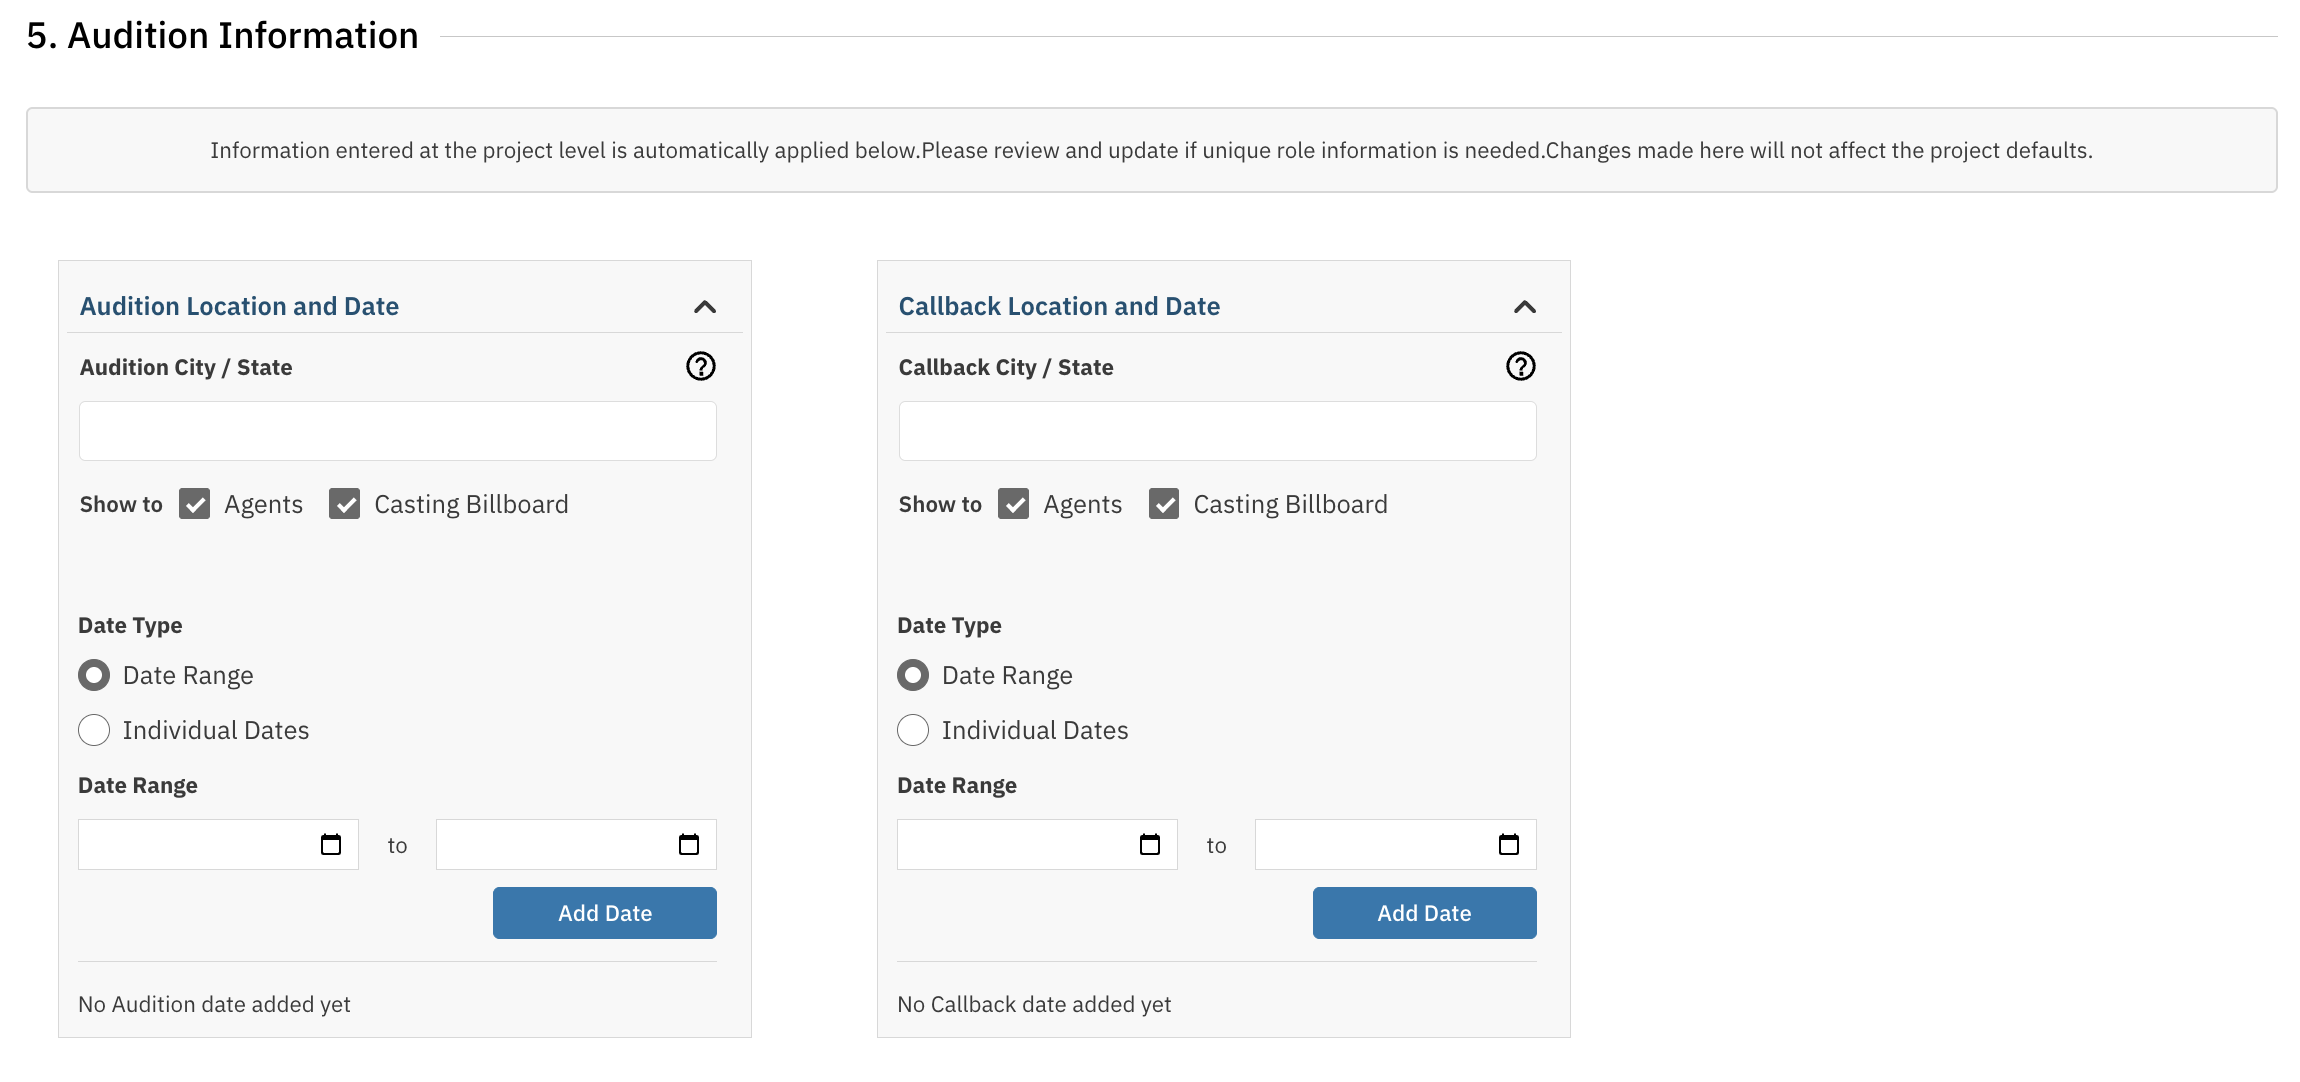
Audition Location - The address or venue where in-person auditions will be held, if applicable.
Audition Dates - The date or date range during which auditions are scheduled.
Callback Information - Note the expected callback dates and format, if callbacks are planned.
Work Information
This section sets the Work details for the role. This will be auto populated with the work information added on the project level. If a role has specific dates that differ from the information posted on the project level, you can add this here.
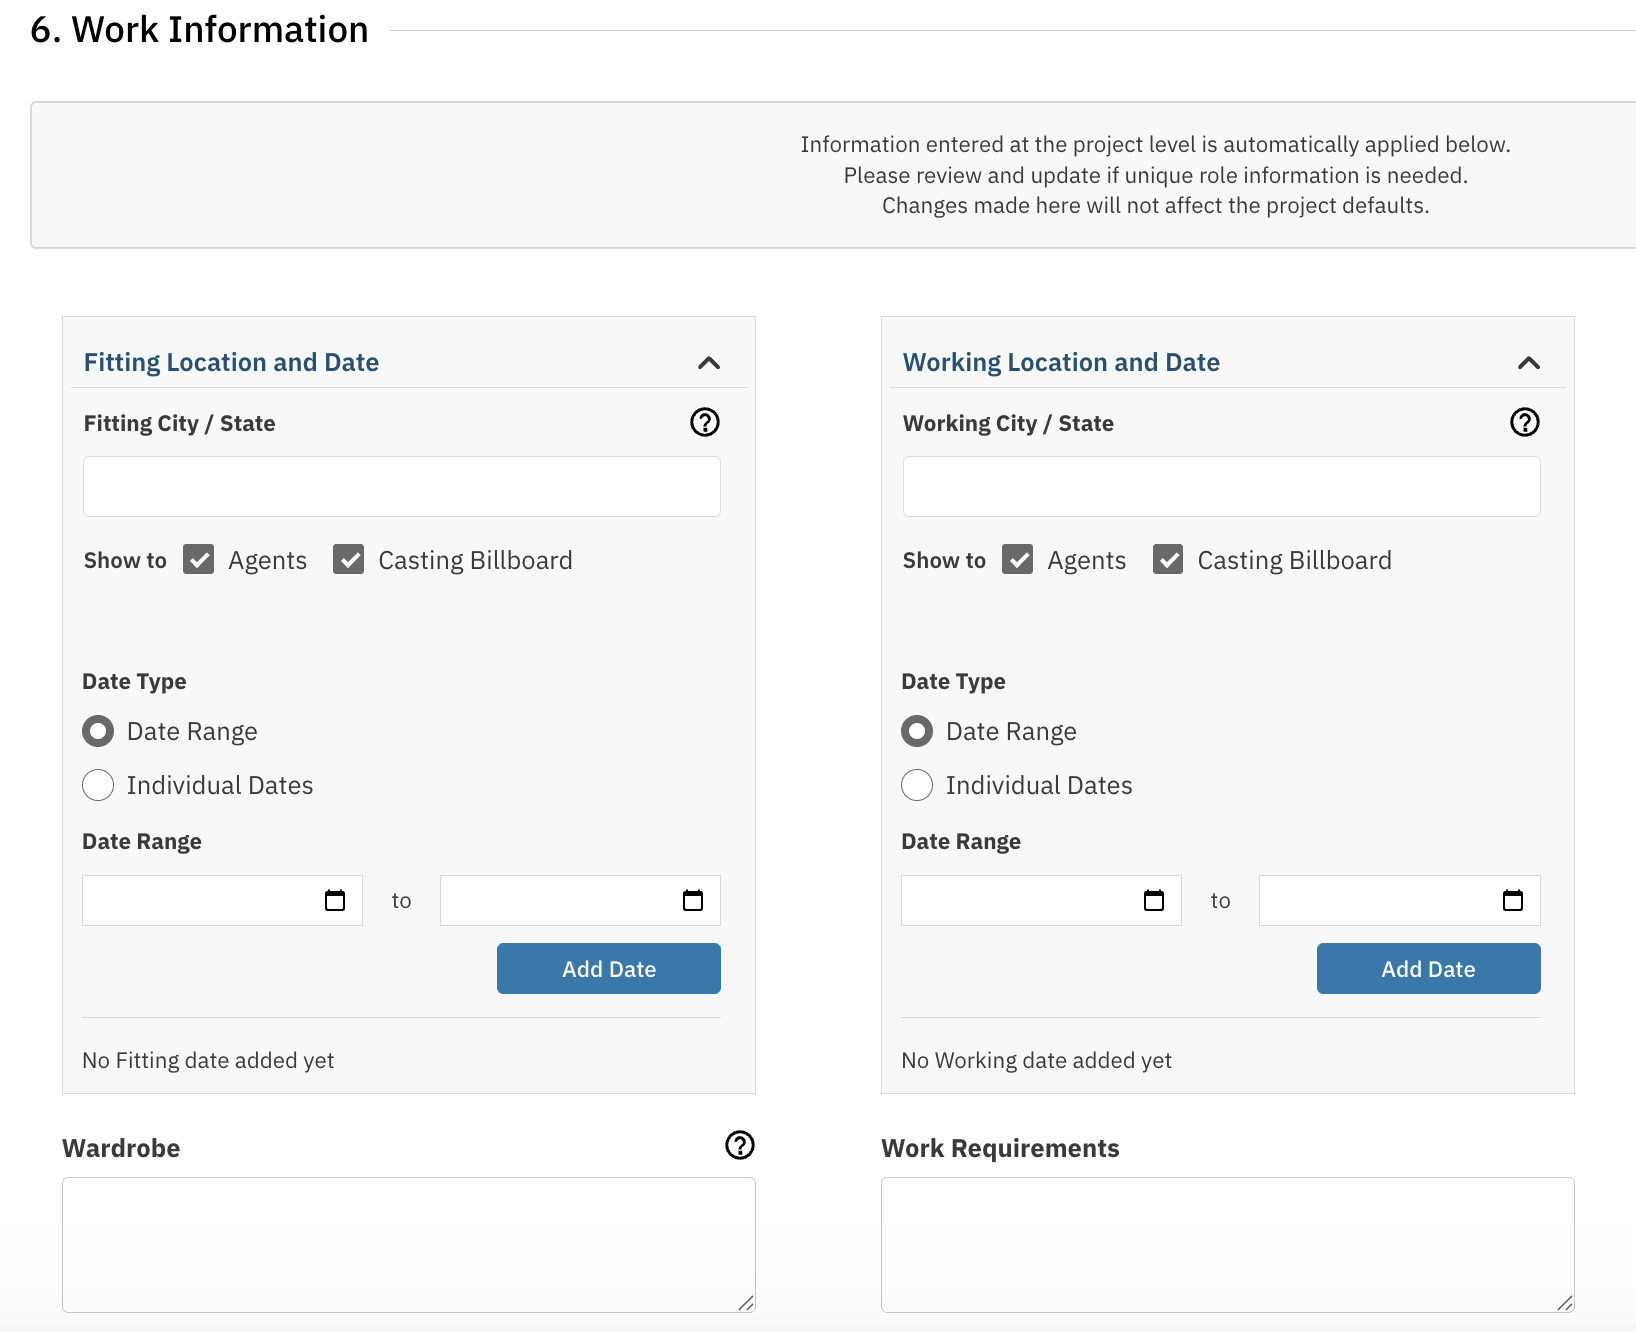
Fitting Location - The city, state, or country where the project is shooting.
Fitting Dates - The expected start and end dates for filming. You can list a range or individual dates.
Filming Location - The city, state, or country where the project is shooting.
Filming Dates - The expected start and end dates for filming. You can list a range or individual dates.
Wardrobe - Is there anything specific talent should wear or bring to fitting, audition, or shoot?
Work Requirements - Additional information regarding what is required to work, such as VISA or Passport.
Submission Requirements
This section defines what talent need to provide when submitting for the role.
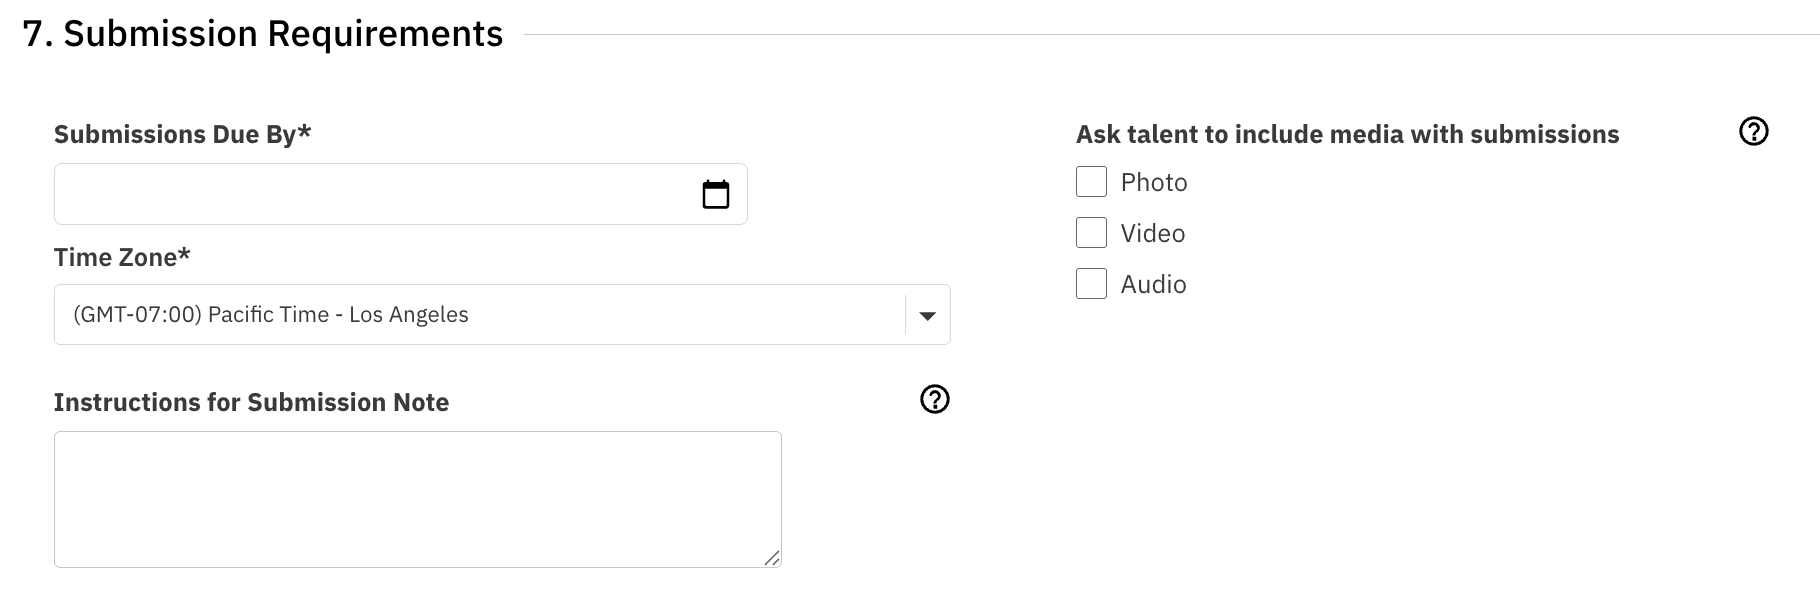
Submission Due By & Time Zone - Let Representatives and Talent know when you need submissions due by. The role will stay open for submissions even past the submission date until you manually close either the role or project.
Media - This is optional - Specify what talent must include with their submission (for example, image, resume, reel, self-tape).
Submission Instructions/ Notes- Also optional, you can note any additional submission requirements, such as specific wardrobe, props, or preparation materials.
Publication Settings
This section determines who can see and submit to this role. This will be auto populated with the settings added on the project level. If you want a role to have specific publications settings you can update them here.
Will this role be published?
Yes - The role will be available for talent and/or representatives to submit based on your publication settings.
No - The role will be internal only and visible only to you. Use this if you plan to add talent directly via search.
Release to Talent on the Casting Billboard - Make the role visible to talent for self-submission. Select locations to determine which talent can see the role.
Release to Representatives - Send the role to agents and managers. You can create a new search, use an existing Rep List, or both.
Choose Locations - Select the geographic locations where you want to release this role. You can search by country and region or type directly into the dropdown.
Once you have filled out all sections, select Save and Add Another Role to continue creating roles, or Save and Go to Project Overview to review and publish.

How to Edit an Existing Role
You can edit a role at any time, even after it has been published.
Navigate to your Project List and click on the project containing the role.
Find the role you want to edit and click the overflow menu (three dots) next to the role name.

Select Edit Role.
Make your changes in any section of the role form.
Click Save before navigating away from the page.
Helpful Tip: To edit publication settings for a published role, click Publish on the project overview and select Widen Publication Settings.
FAQs
Do I have to fill out every section when adding a role?
No. Many sections are optional, including Role Description, Audition Information, and Submission Requirements. Only the General Role Information section is required to save a role.
Can I add a role to a project that has already been published?
Yes. You can add new roles to published projects at any time. After creating the role, click Publish on the project overview and select Publish New Roles to make it live.
Can I change the publication settings after a role is created?
Yes. You can edit a role's publication settings at any time by selecting Edit Role from the overflow menu, or by using Widen Publication Settings from the Publish dropdown.
What if I do not know all the audition details yet?
You can leave the Audition Information section blank and fill it in later when you edit the role. You can also update audition details individually when scheduling talent.
Can talent see my role before I publish it?
No. Talent and representatives will only see your role once you choose to publish it. Roles created as internal (not published) are visible only to you.
Can I add sides to a role after it has been created?
Yes. You can edit any role and upload sides at any time. Sides must be in PDF format.