
CASTING DIRECTORS: How Do I Set my Publication Settings and Publish my Project?
This article is for Casting Directors who want to publish their projects to talent and/or talent representatives on Casting Networks. It covers how to set publication settings at both the project and role levels, the difference between publishing and keeping a role internal, how to publish projects, and how to verify that your roles have been successfully sent.

Who Can I Release a Project To?
You can release a project to two primary audiences:
Talent Representatives - You can publish to representatives anywhere in the world, as many or as few as you wish, based on filtering options
Talent on the Casting Billboard - Casting Billboard is our platform for talent to self-submit. Here, they can view and submit to roles that casting releases publicly. The location(s) you choose will determine which talent can see the role.
For example, if you only choose "Los Angeles" to release a role, only talent located in Los Angeles will see that role on their Casting Billboard.
Where to Set Your Publication Settings
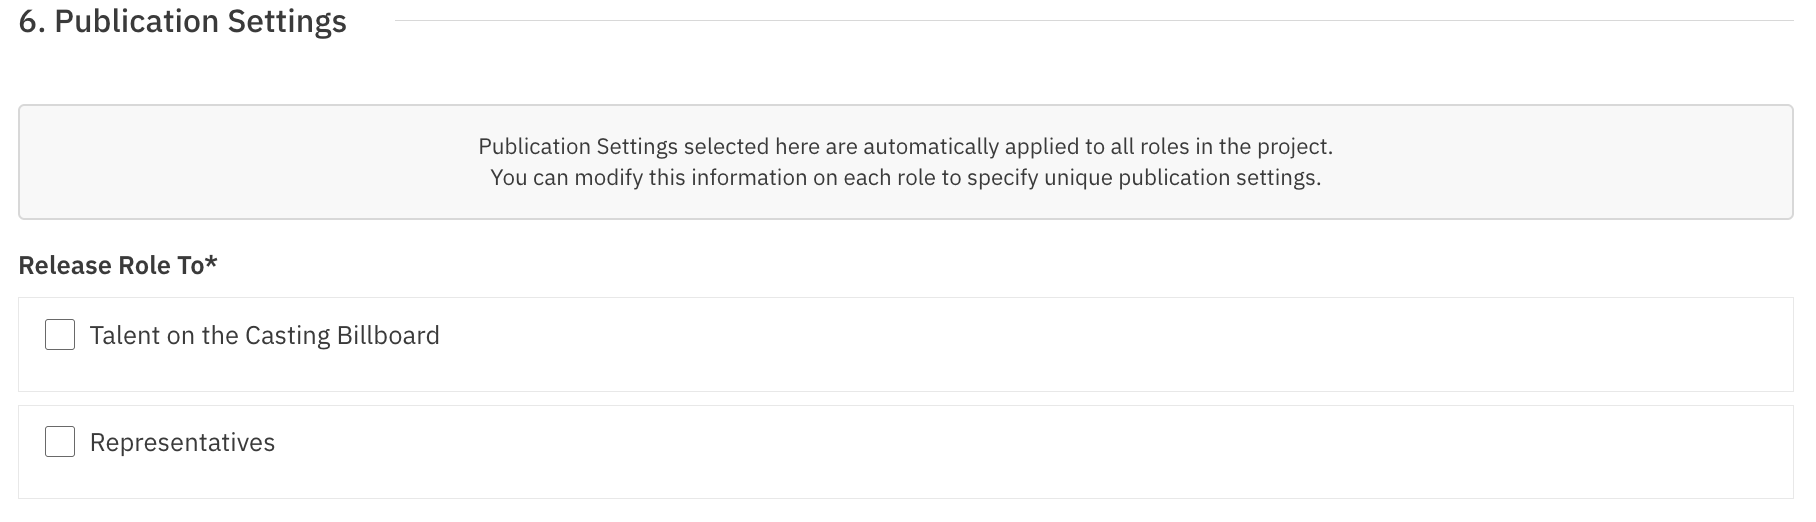
When creating or editing your project, you can set your publication settings at the project level - you can see where this is located here. See the "How to Set Your Publication Settings" section below for details on configuring these options during project setup.
If you want to set specific or different publication settings for individual roles, you can do this when adding or updating roles - you can see where this is located here. While in the edit role view, navigate down to publication settings — here you will find the same options that are available at the project level, allowing you to customize release settings per role as needed.
How to Set Your Publication Settings
First, while adding or editing your role, you must have selected Yes to release the role. See how to Create or Edit your role here.
Do you intend to publish this role?
When creating a role, you have the option to indicate whether or not you intend to publish it.
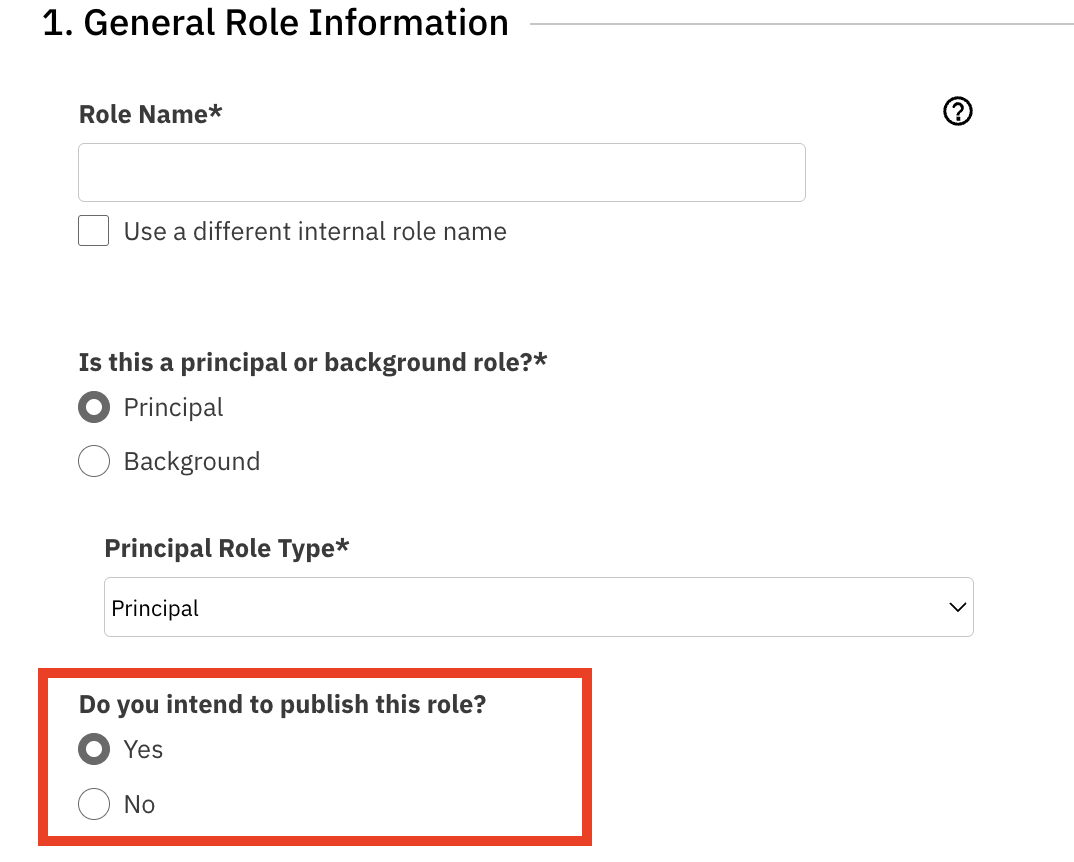
Yes: The role will be made available for talent and/or talent representatives to submit based on your publication settings.
No: The role will not be made available for talent or representatives to submit. It will be visible only to you and listed as an internal role. Use this option if you plan to add talent directly via search.
Releasing Projects to Representatives
You can release roles to representatives in three ways:
Creating a New Search to release the role to specific representatives
Releasing to a Representative List
Releasing to both a representative list and a new search
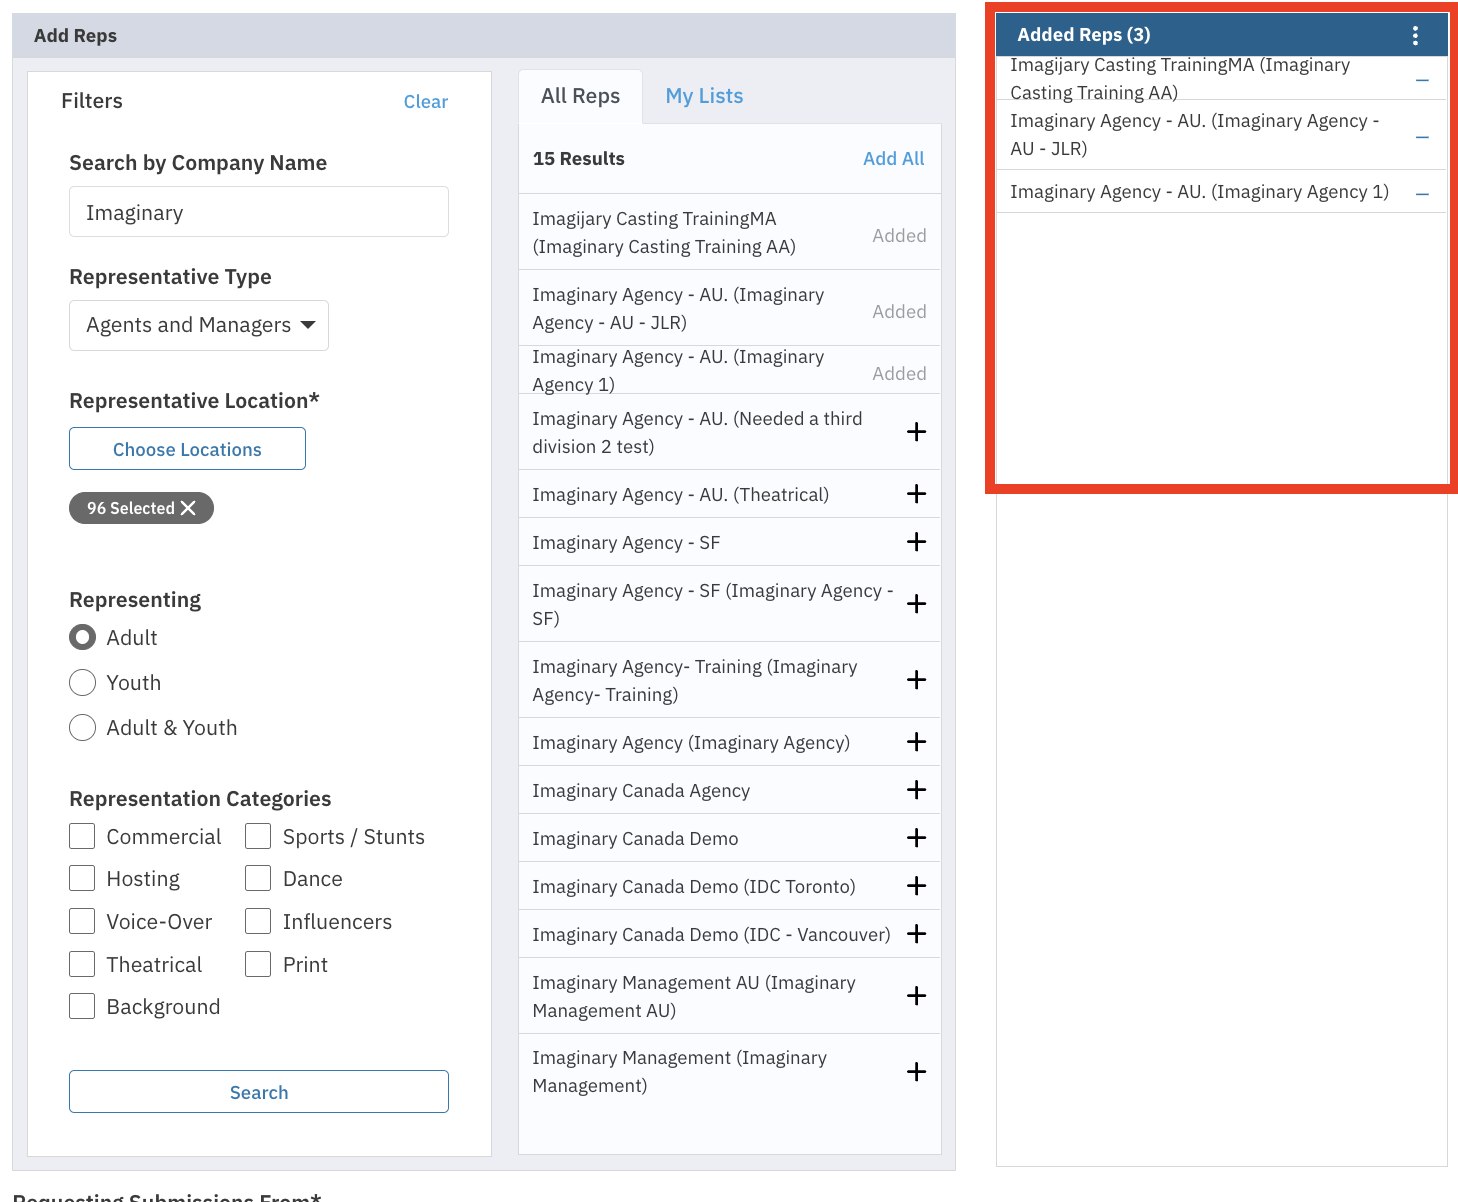
Releasing to Representatives via a New Search
This feature allows you to search for specific types of representatives (Agents, Managers, or both) and filter by the type of talent they represent and their location.
Navigate to the Publication Settings while adding or editing a project or role.
Under Release Role To, click the checkbox next to Representation. A filtering section will appear below.
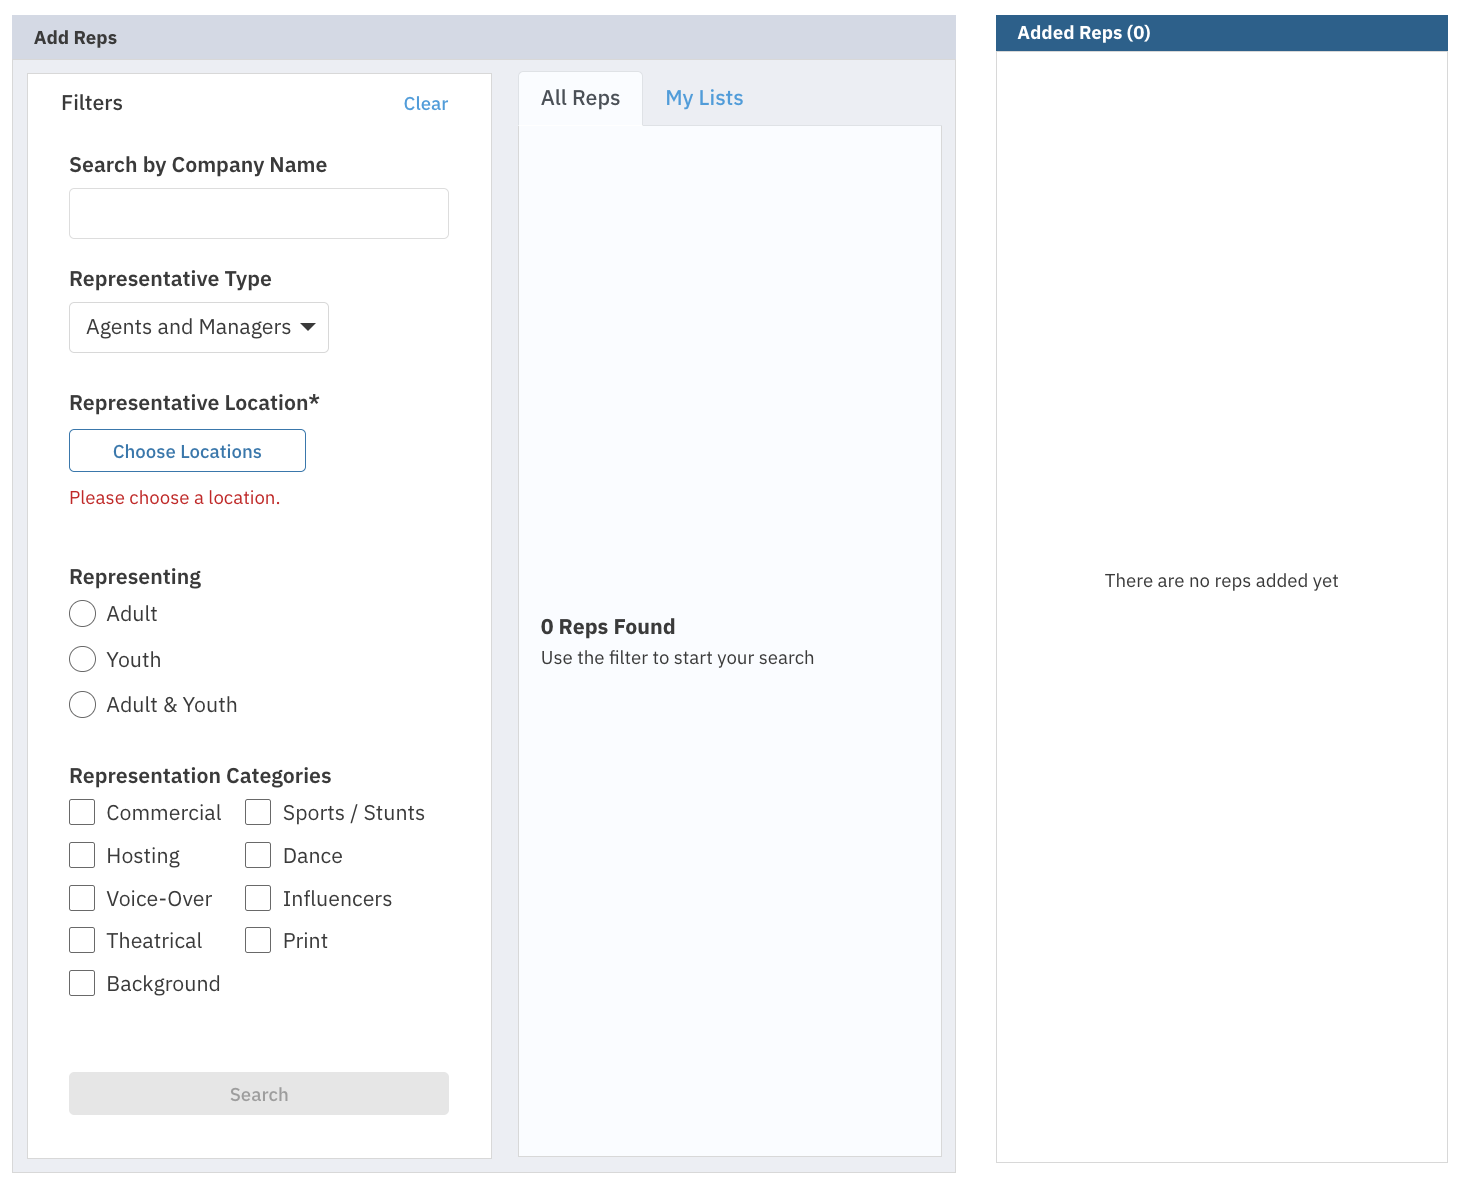
You can filter by any of the following options:
Search for a specific representation company by name
Select a representation type from the dropdown (Agents and Managers, or Agents Only)
Choose what talent type a representative represents (Adults Only, Youth Only, or Adult & Youth)
Choose what category of talent they represent. You can select multiple categories:
Commercial
Hosting
Voice-over
Theatrical
Background
Spots/Stunts
Dance
Influencers
Print
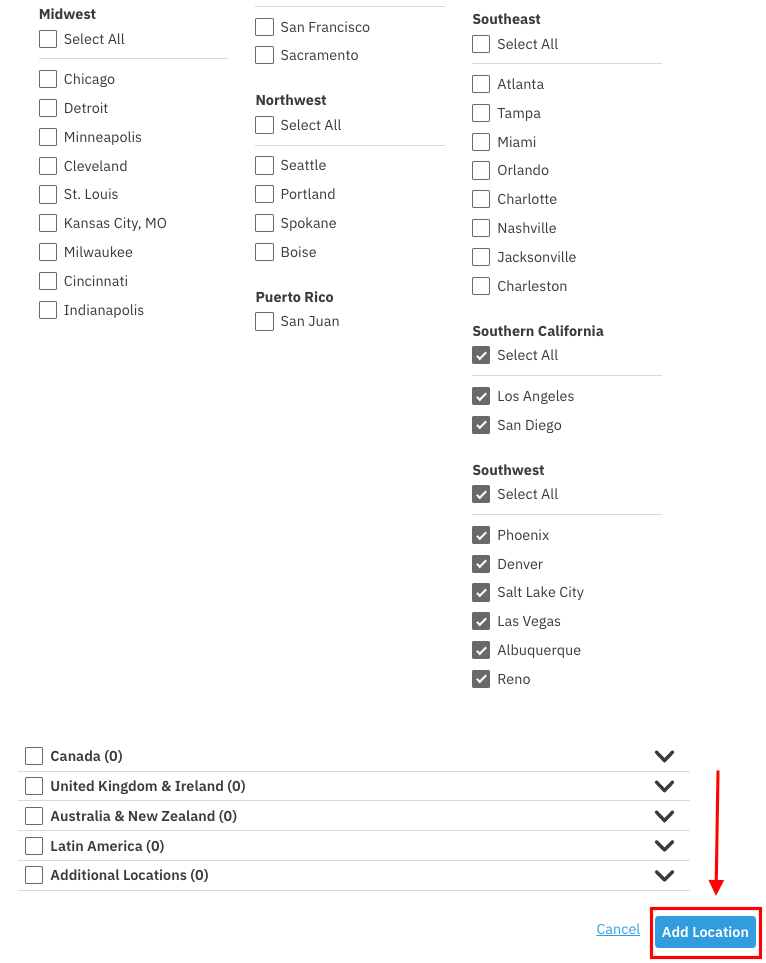
Click Choose Location to view a full list of countries, states, and cities where you can release your project. You may select as many locations as you wish, but you must select a minimum of one representative location.
Once you have your filters selected, click the Search button.
Results from your filtered search will appear in the middle column. You can select Add All or individually select representatives by clicking the + icon to the right of their name.
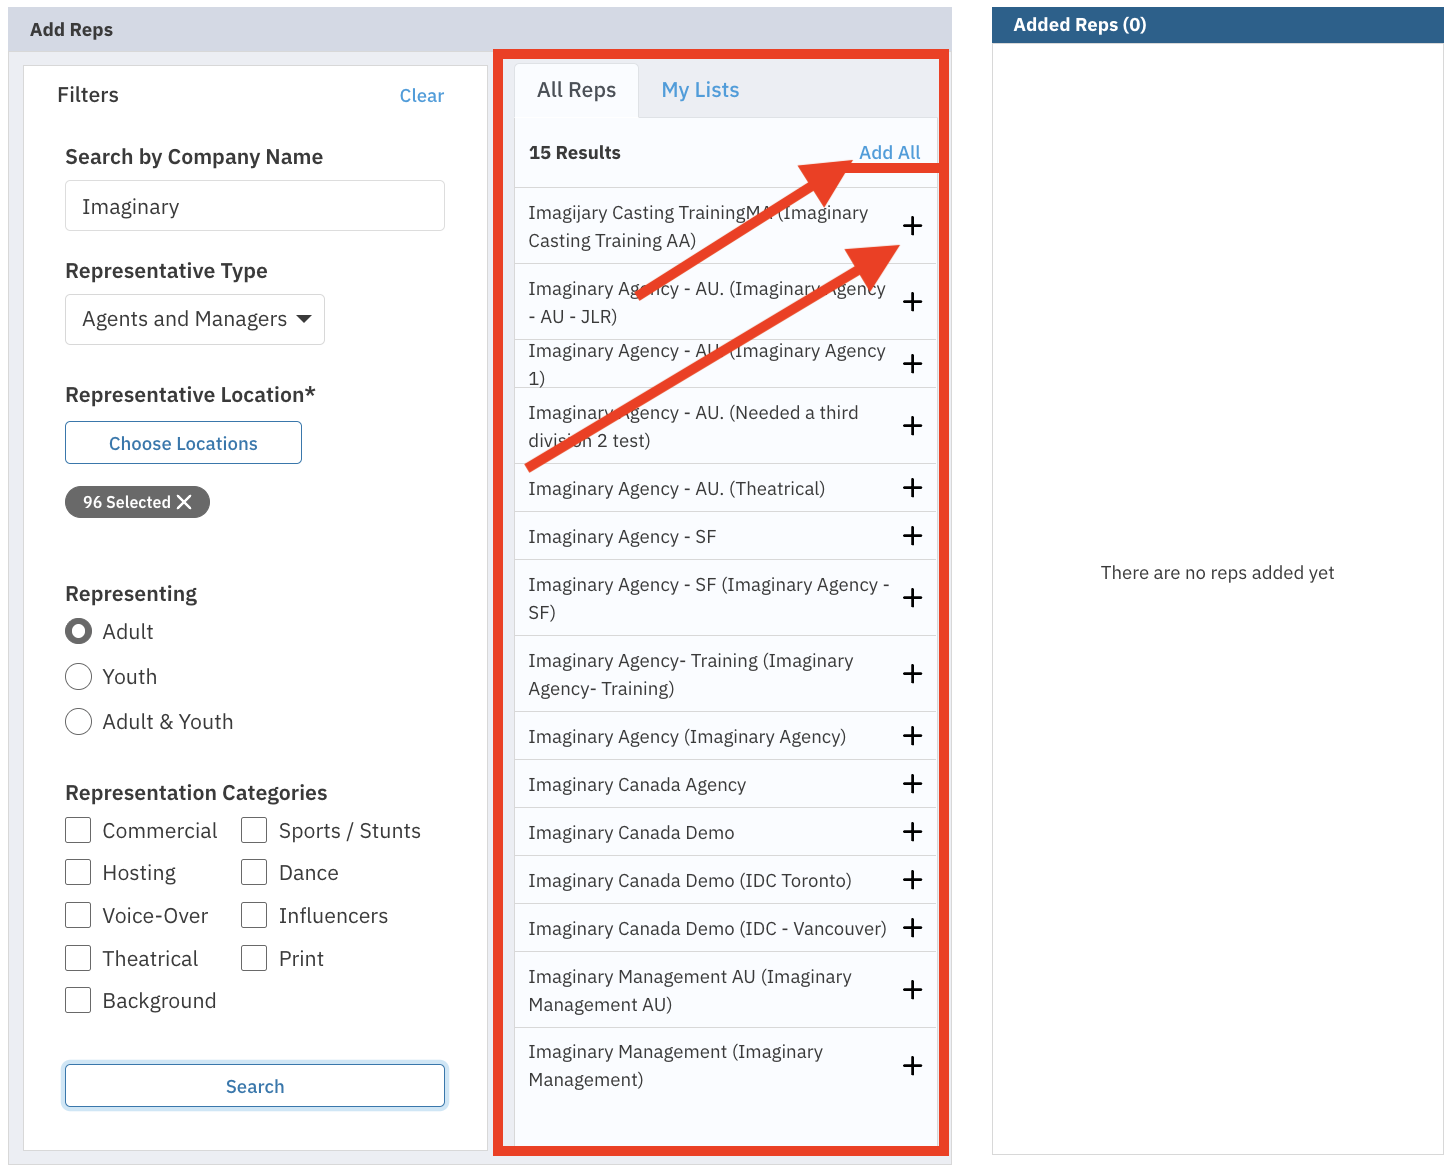
Once you have added representatives, they will appear in a list in the far right column.
Releasing to a Representative List
You can release a role to a representative list previously created on your account.
Select Reps List
Select a Rep List by clicking on the Select Rep List dropdown
Select the location where you would like to request submissions from
Once your location(s) has been chosen, select Save and Go to Project Overview or Save and Add Another Role

Choosing Locations
Whether you are releasing your role to the Casting Billboard or to Representatives, you will need to choose a location. Since we have a global platform, you can choose to publish your roles to any location you desire.
The Choose Locations feature opens a modal that allows you to easily view all of the location options, organized by country and region. However, if you already know where you would like to publish, you can simply type into the dropdown menu to make your selections quickly.
Releasing to the Casting Billboard
To release a role on Casting Billboard:
Choose Talent on the Casting Billboard
Select the Choose Locations button under Requesting Submissions From
Once your location(s) has been chosen, select Save and Go to Project Overview or Save and Add Another Role

Setting Publication Settings on Individual Roles
You can set specific publication settings on individual roles also - this is the same set up as selecting on the project level.
While in the edit role navigate down to publications settings - Here you will find the same options that were on the project level.
Choose to release the role to:
Talent on the Casting Billboard
Representatives
Or both Talent on the Casting Billboard and Representatives
How to Publish Your Project
Once your project is created and your roles you want to publish are ready follow the steps below to publish:
Click on your project name
On the project overview page, click Publish
Select Publish
Note: You will be able to include a message to talent representatives or to talent, depending on your publication settings for new roles.
Click Publish to confirm
The status of your project is visible in the status column on your projects list page. It will appear as Active or Not Yet Published.
Understanding Your Publish Options
When you click the Publish button, you may see different options depending on the status of your roles.
Publish New Roles
This option publishes a project and its roles for the first time, or publishes any new roles added since the last time the project was published.
Request Additional Submissions
Once a role is published, you may need to see more options. This feature allows you to request that talent and/or representatives who already have access to the role provide additional submissions.
You have the option to include a message when requesting additional submissions
Note: Requesting additional submissions for roles where submissions are closed will update the role status to Requesting Additional Submissions
Widen Publication Settings
This option allows you to change the publication settings for a previously published role to request submissions from talent representatives or talent who did not have access originally.
To widen publication settings:
Sign in to your account
Click on the project title
Click Publish
Select Widen Publication Settings
Choose the role(s) you wish to update
Choose Talent on the Casting Billboard and/or Representatives
Note: You can search for additional talent representatives, choose an existing Reps List, or include additional locations.
Follow the steps to add different locations and/or representatives
Click Send
Verifying Role Release Details
Once you have published your role, you can check which talent representatives received your release to ensure your project reaches the right audience.
Locate the paper plane icon associated with your role. This indicates that the role has been released.

Hover over the icon for a quick look at how many talent representatives you published the role to.
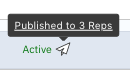
Click on the icon to see a specific list of the talent representatives you published the role to.

FAQs
What happens if I choose "No" when asked if I intend to publish a role?
The role will remain internal and will not be visible to talent or representatives for submission. Only you will be able to see it, and you can add talent directly via search if needed.
Can I publish to both the Casting Billboard and Representatives at the same time?
Yes. You can choose to release a role to Talent on the Casting Billboard, to Representatives, or to both simultaneously.
What does the paper plane icon mean next to my role?
The paper plane icon indicates that the role has been released. Hovering over it shows how many representatives received the release, and clicking it shows the specific list of recipients.
Can I change publication settings after a role has already been published?
Yes. Use the "Widen Publication Settings" option to adjust locations or add representatives to previously published roles.
Will talent see my role if I don't publish it?
Talent and representatives will not see the role for self-submission if it is not published. However, they may still see role information if they are specifically requested or scheduled for that role.