
CASTING DIRECTORS: How do I use Skype and Zoom with FastCapture®?
This article explains how to integrate Zoom and Skype with FastCapture® to record remote talent, share camera feeds with clients, or conference in multiple parties.
Zoom and FastCapture®
To use Zoom with FastCapture®, follow these steps:
Set up your Zoom Meeting Link and share it when you send times to talent/agents.
Start the Call and admit clients if it is a callback.
Admit your actor.
Use the Record button and select Record to 'This Computer' to record the speaking party.
*Note: You may want to instruct your clients to mute their microphones (and mute yourself) as the recording will jump to the feed of anyone that makes a sound.Select STOP between takes to create individual takes, or select PAUSE to create one movie per actor.

Use the Participant or Waiting Room window to remove the actor when they are finished auditioning.
Repeat Steps 3 through 6.
When you have completed your session, End the meeting. Your media will be converted and saved to Documents in a new, dated folder under the Zoom heading. These files can then be imported into FastCapture® and uploaded.
Skype and FastCapture®
Skype is generally used with FastCapture® for a few specific purposes:
Scenario 1: I have a client that wants to attend the session remotely. This entails sharing the FastCapture® camera with Skype so the client can view the live feed. This does not require FastCapture® features or interrupt the standard workflow.
Scenario 2: I have a talent that wants to attend the audition remotely. I want to record the video feed from Skype and upload it to my Presentations page via FastCapture®. In this scenario, the Skype call is the Session content.
Scenario 3: I have clients in several locations, talent in several locations, and I’m in another. I want to conference everyone in and hold auditions virtually while recording the action and uploading to FastCapture®.
Solution to #1: Sharing the FastCapture® camera with Skype
Prerequisites:
A device that supports multiple applications using it. (Currently, Blackmagic is the only known device that often does not allow this functionality.)
A Skype Account.
Steps:
Open/Create your FastCapture® document.
Plug in your camera and converter box and power on all devices.
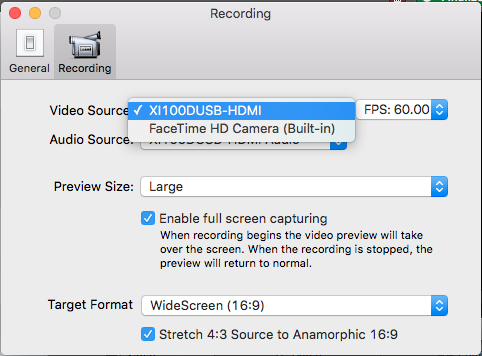
Configure FastCapture® to use the desired devices by clicking FastCapture® in the upper left-hand corner of the screen, then selecting Preferences. Choose the Recording tab and the appropriate video and audio sources.
Launch Skype and login.
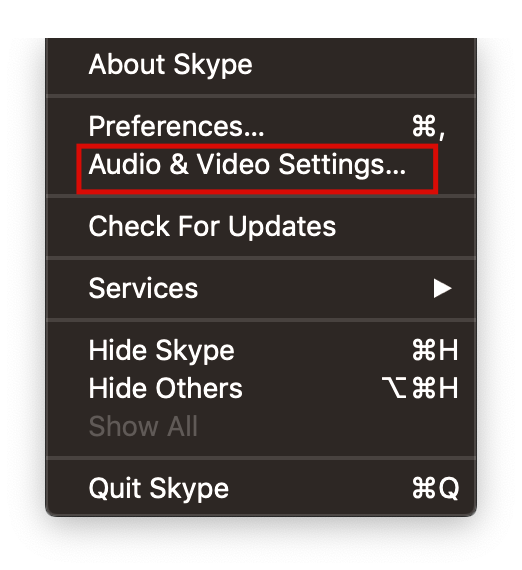
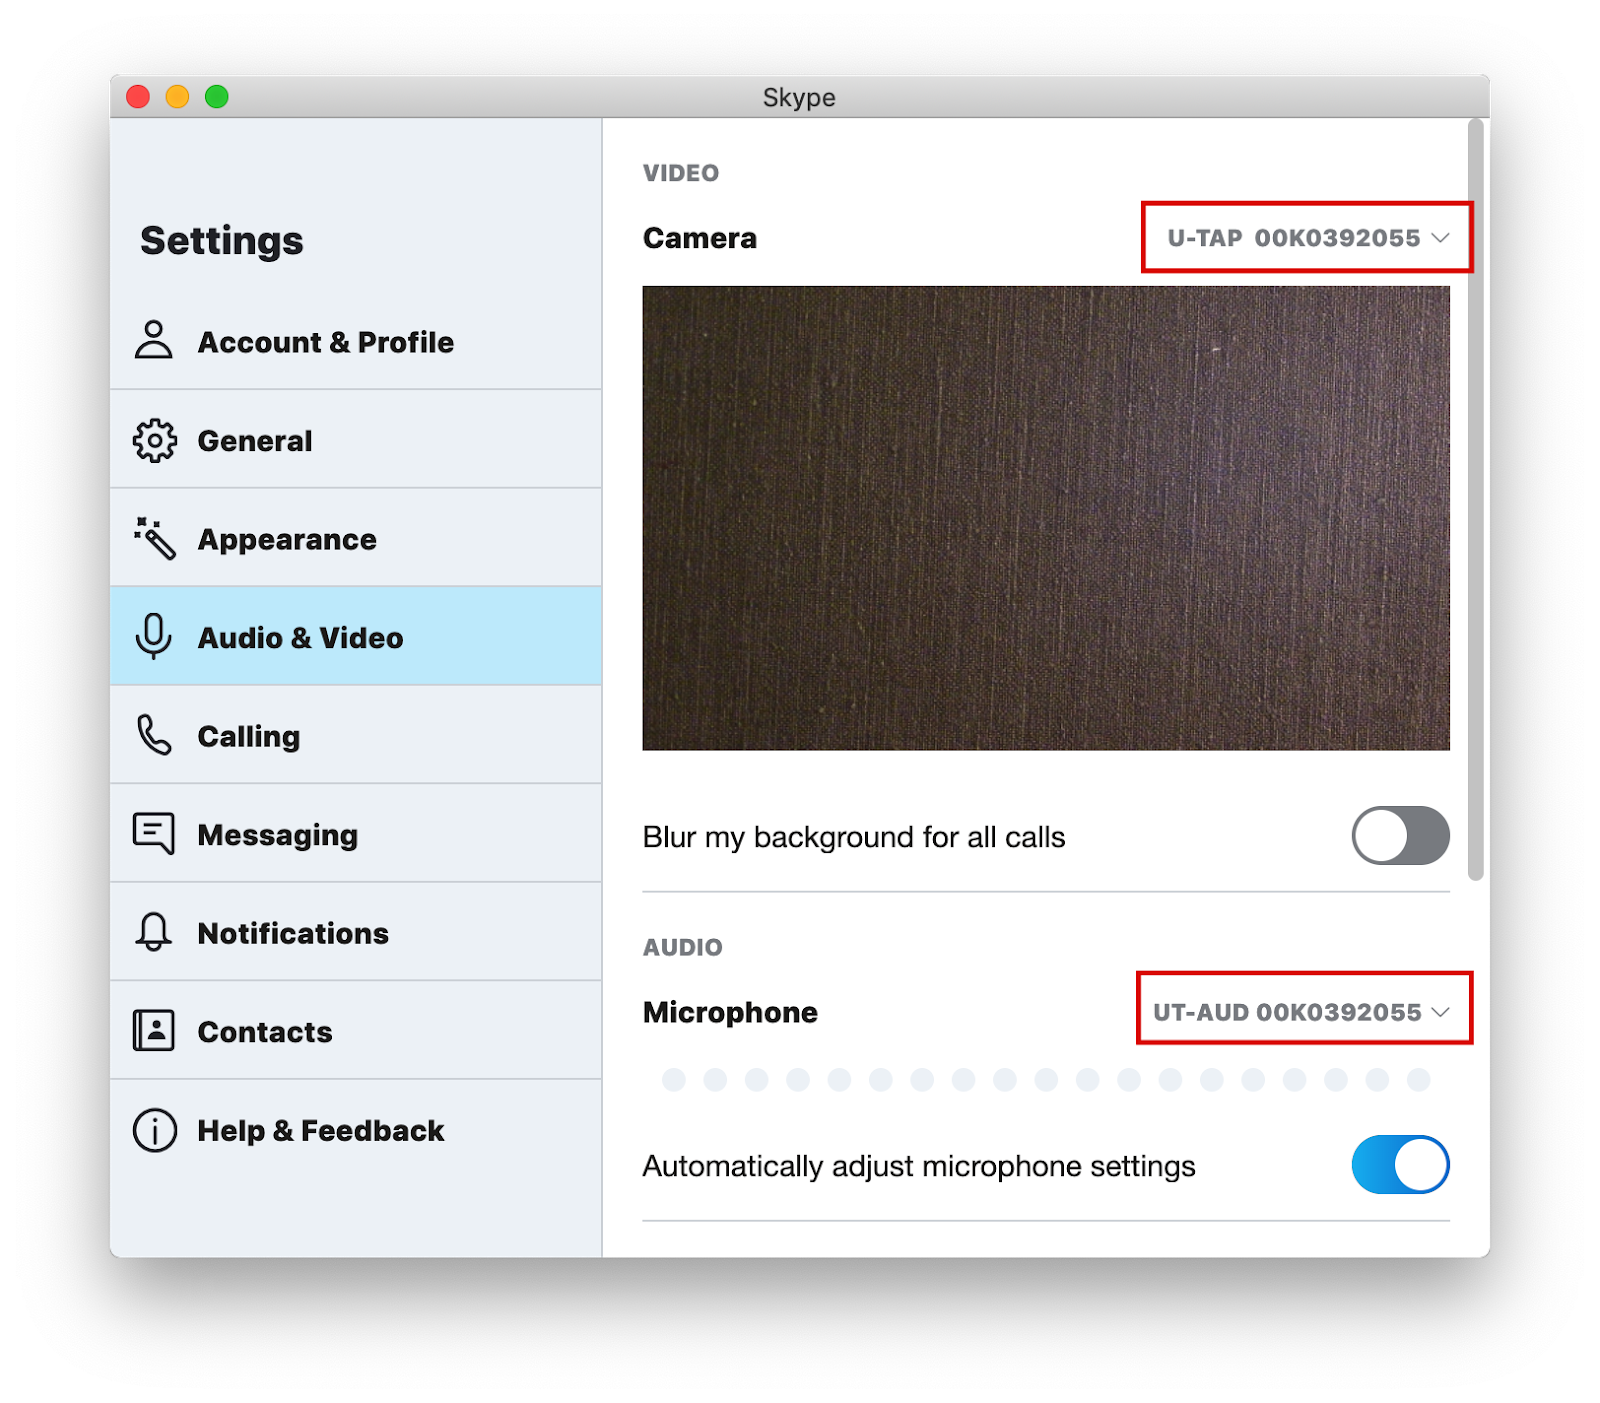
Configure Skype Preferences to use desired devices. Ensure that the microphone and camera are using the same source if you wish for your client to hear the audio from the session's camera.
Make a Skype video call to the desired user and begin your session. Ensure no other applications are running, as it may tax your system's performance and affect video quality.
Solution to #2: Recording a Skype call with Ecamm Call Recorder and adding to FastCapture® with Watch Folder
Prerequisites:
Install Skype v8.57.0.116 or later.
Install Ecamm Call Recorder v.3.0.7 or later ($39.95 One Time Licensing).
Enable the Watch Folder feature in FastCapture®.
Steps:
Download and install Skype and Call Recorder.
Launch Skype, your new software Ecamm Movie Tools, and FastCapture®.
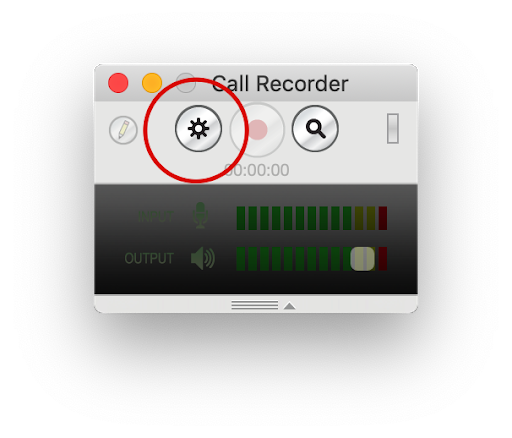
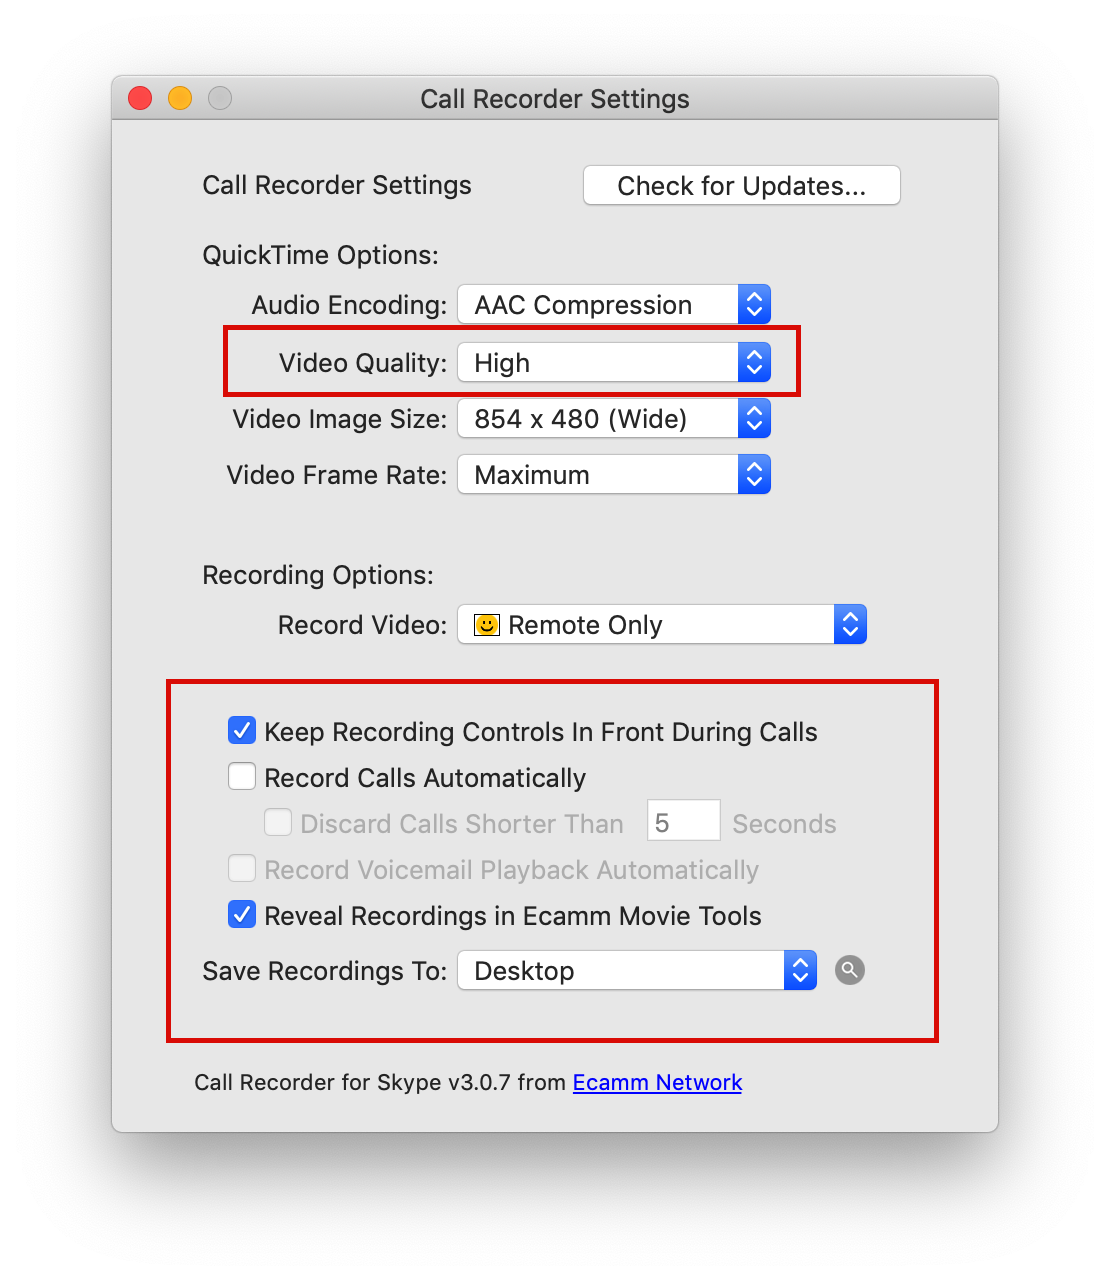
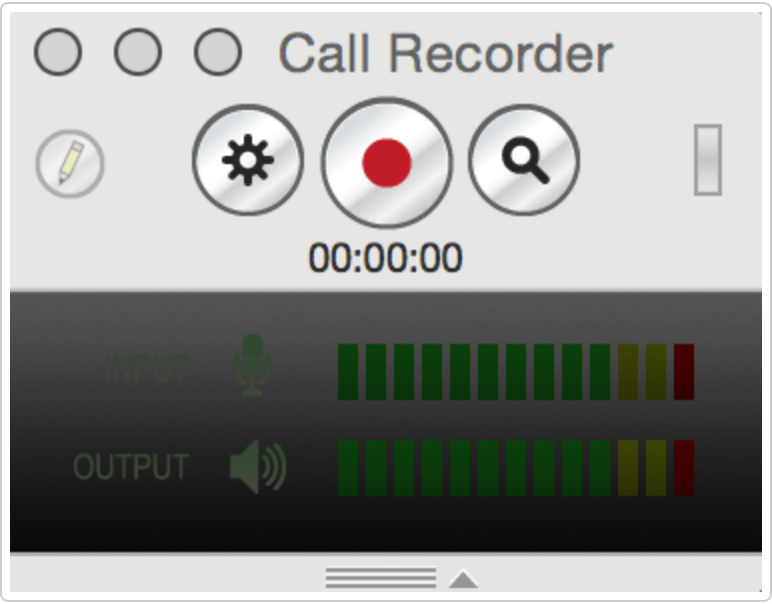
Select Call Recorder Settings (the little gear on the controller).
Set Video Quality to High.
Select Reveal Recordings in Ecamm Movie Tools.
Set: Save Recordings to Desktop.
Open FastCapture® Preferences.
Under General, select Enable watch folder.
At the Watch Folder dropdown, select Other.
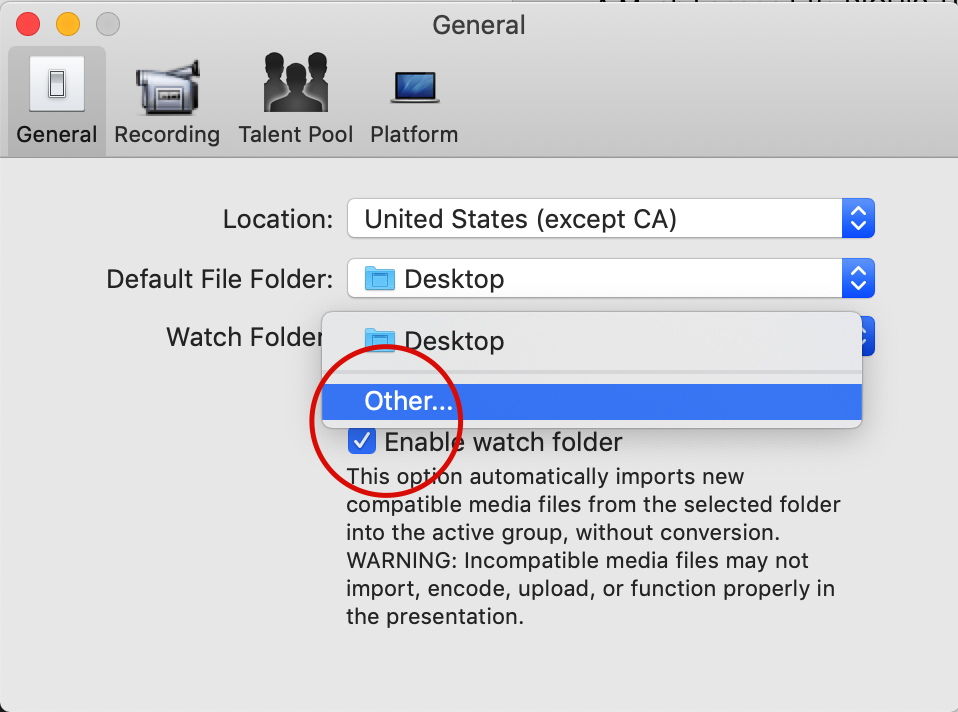
Create a New Folder (Title it ‘Watch Folder’), then Select to set it.
Create your FastCapture® File.
Navigate to Skype and make your call. Once ready to record, select the Record Button. Stop and start recording in Call Recorder in between takes, or end the call to stop recording.
Navigate to Ecamm Movie Tools, select your video, and select Export. (Uncheck ‘Reveal in Finder when Done’ on first export.)
Title the Clip if you’d like and choose your Watch Folder as the ‘Where’.
Repeat steps 13 and 14 as needed for multiple takes.
Navigate to FastCapture® and notice your video(s) appear in the media bin. Add the appropriate talent to the Current Talent field and hit finalize!
Repeat Steps 12-15 until your session is complete.
Solution to #3: Using Skype’s ‘Meet Now’ feature to conference multiple individuals in different locations
*Note: We’ve found Skype is the best for this scenario because neither talent nor clients need a Skype account. They simply need your meeting link and Google Chrome or Microsoft Edge to join your meeting—and your account is FREE!
Follow steps 1 - 11 of Solution to #2 (Recording a Skype call with Ecamm Call Recorder and adding to FastCapture® with Watch Folder) to set yourself up.
Navigate to Skype and select Meet Now.
Click the "Join Now" link to copy and paste the link into an email to your Clients. Email your actors individually when their time arrives.
Select Start Call. Users with the link will join when able.
All users—except the actor and casting director—should hide video and mute until they need to speak.
Stop and start recording in Call Recorder in between takes.
When you are finished auditioning the actor, have the actor click the hang-up button (End Call) OR you can remove the actor by clicking to the right of their name and selecting Remove User.
Follow steps 13-15 of Solution to #2 to finalize your videos in FastCapture®.
Send your next actor their link for them to join and repeat steps 6-8!
As always, a test ahead of time is recommended when dealing with new technology. We are happy to help test!