
Why am I getting an error when uploading my media?
This article is for any Casting Networks user who is experiencing an error when trying to upload media to their profile or for a project. Here, you'll find information on accepted file types and sizes, and step-by-step instructions on how to properly re-export or resize your files to resolve common upload issues.
Accepted File Types & Sizes
To ensure a successful upload, please make sure your media files are in one of the following formats and within size restrictions:
| File Types | Minimum | Maximum |
Photo | KPG, JPEG, GIF, PNG | 360 x 360 px | 30 MB |
Video | MP4, MOV, M4V | None | 600 MB |
Audio | AAC, MP3, OGC | None | 50 MB |
Why Is My File Size So Large?
The size of a media file can vary significantly depending on several factors.
Photo size is affected by color depth, file format (e.g., JPEG, PNG), compression level, and the image content itself.
Video size depends on resolution (e.g., 720p, 1080p, 4K), frames per second, bitrate, audio quality, length, file format (e.g., MOV, MP4), and compression level.
Audio size is determined by the file format (e.g., MP3, WAV), bitrate, and the length of the recording.
How Do I Fix an Upload Error?
Often, upload errors occur because the file is too large or not encoded properly. A simple way to fix this is to re-export the file, which creates a new, clean version of the file that is often smaller and more compatible with our system. Below are instructions for Mac, PC, and online tools.
Re-exporting or Resizing Your Media File on a Mac (using QuickTime)
A quick way to re-export and compress a video is to use QuickTime, a program that comes pre-installed on Mac computers.
Open your video file in QuickTime.

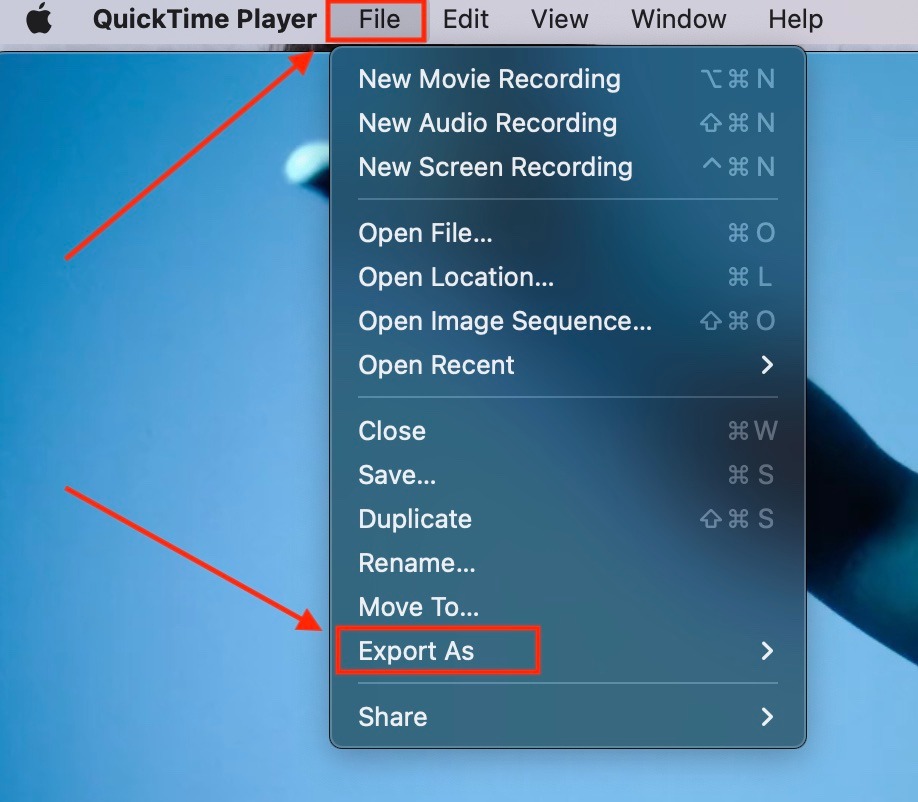
Once the video is open, navigate to the menu bar at the top of the screen, click File, and scroll down to Export As.
Choose a smaller resolution, like 720p. This will reduce the file size while keeping the resolution clear.

Select the location where you want to save the new file and click SAVE.
Try uploading the newly exported file.
Re-exporting or Resizing Your Media File on a PC (using Microsoft Clipchamp)
This tutorial shows you how to re-export video files using Microsoft Clipchamp, a video editing software that comes pre-installed on computers running Windows 11.
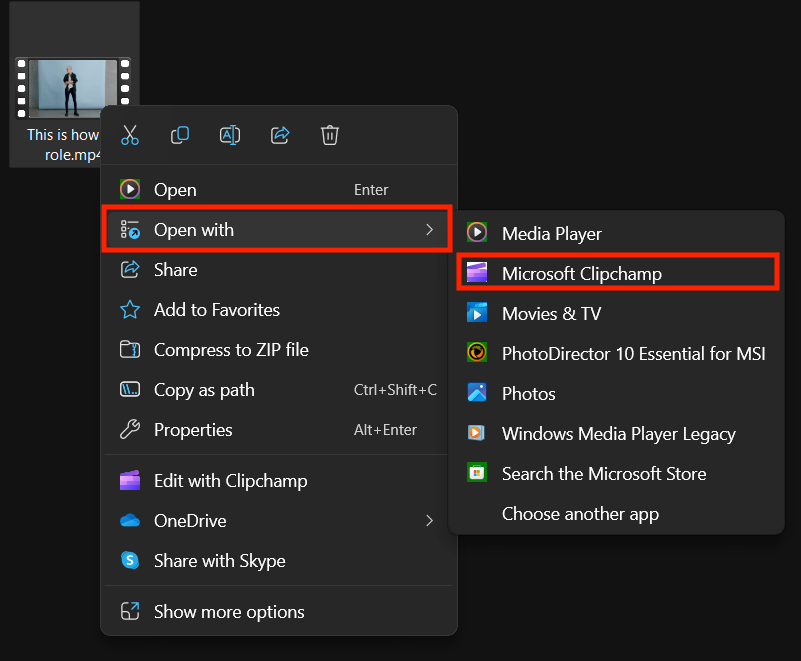
Find the video file in your File Explorer. Right-click the file, hover over Open With, and select Microsoft Clipchamp.
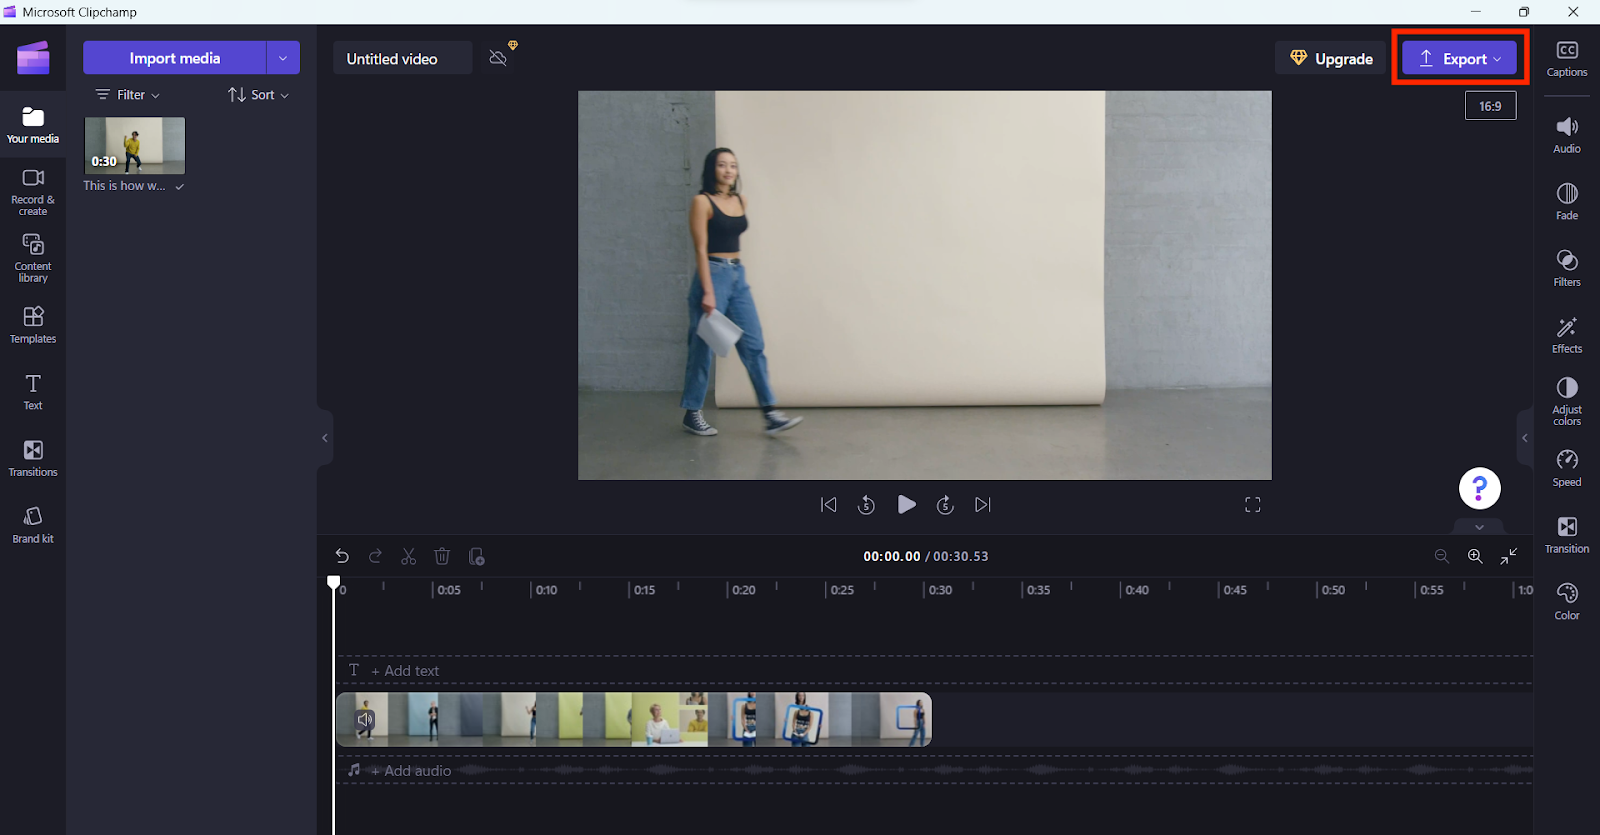
Once the file opens in Clipchamp, you will see the video in the preview window. You can give the file a new name in the textbox at the top left.
Click the Export button at the top right of the screen.
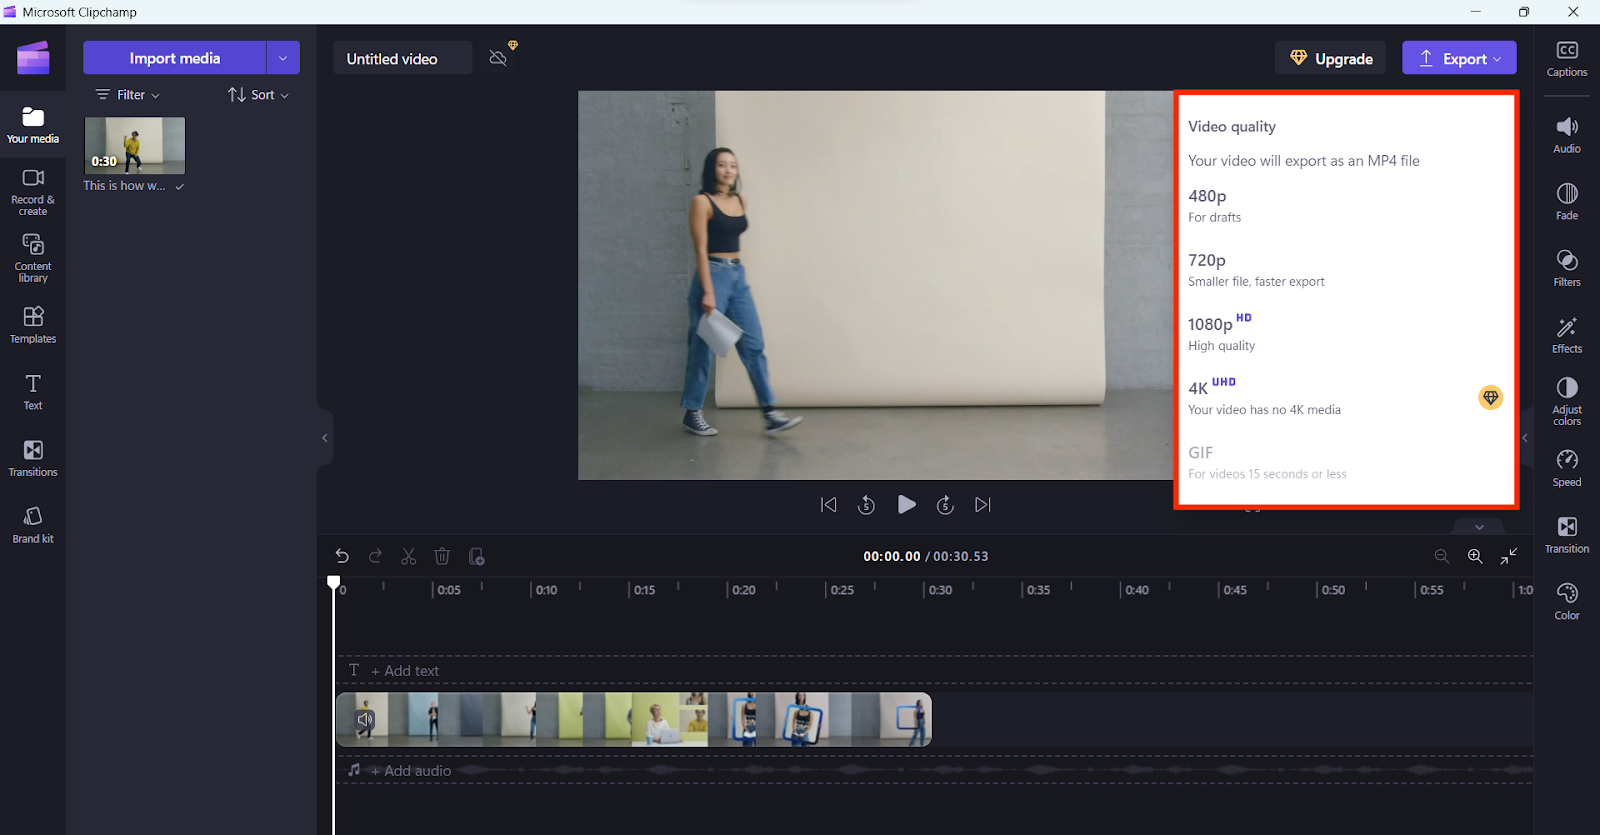
You will see a list of options for video quality. We recommend selecting either 480p or 720p to reduce the file size while retaining quality.
The video will export and save a new copy in your Downloads folder.
Open your Downloads folder to find the exported video.
Try uploading the newly exported file.
Resizing Your Media File with an Online Tool (Mac or PC)
If you prefer not to use the software on your computer, you can use a free online video compression website.
Search for "Free Video Compressor" in your preferred search engine. You will see many third-party websites to choose from.
Most of these websites are simple to use. You just upload your video, select a "compress" option, and the site will process it for you. Some sites may offer "Advanced" options that let you choose the final file size you want.
The website will take a few moments to compress your video and will then provide a link to download the new, smaller version.
Note: Please be aware that some of these free third-party websites may have pop-ups and ads. Always ensure your computer's virus protection is up-to-date before visiting an unknown website.
Frequently Asked Questions (FAQs)
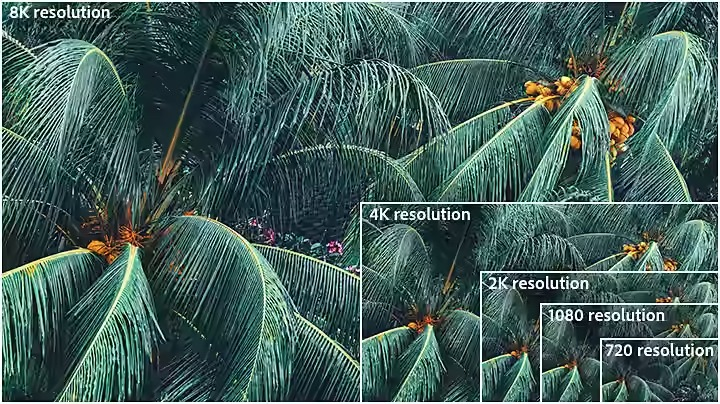
What's the difference between 720p, 1080p, and 4K video?
Video resolution refers to the number of pixels in each frame, which determines how clear and detailed the video appears.
For resolutions like 720p and 1080p, the name refers to the number of pixels running in a vertical line down the display.
For 2K, 4K, or 8K video, the name refers to the approximate number of pixels running in a horizontal line across the frame.
In short, the more pixels, the higher the video quality, and the larger the file size will be.
What is the recommended video resolution for uploads?
For the best balance of quality and file size, we recommend uploading your videos at 720p (HD). If you have a longer video or are running into trouble with the upload, resizing it to 480p (Standard Definition) is a great option. This will create a smaller file that uploads more quickly.