CASTING DIRECTORS: How do I use the Project Wizard to create a new project?

Edited

This article explains how to use the Project Wizard to streamline the setup process. It allows you to see your progress through a simple three-step bar, ensuring you get your project posted faster.


How do I access the Project Wizard?

 To get started with the new wizard, follow these steps:

  1. Navigate to the Projects List page.

  2. Locate the New Project button at the top of the screen.

  3. Select Project Wizard from the dropdown menu.

An image of a "Projects List" screen from a web application. A button labeled "**New Project**" is highlighted at the top right, and a red box and arrow indicate a dropdown menu that appears when the button is clicked. The dropdown menu contains two options: "**Project Wizard**" and "**Create Project**". Below the title, there is a section for "Filters" with a search bar and dropdown menus for "Project Type," "Project Status," and "Series," along with a blue "Filter" button.


How do I complete the Project Wizard steps?

Once selected, you will see a progress bar at the top of the screen indicating three distinct steps. Follow the instructions below to complete each section.

Alt text: A **three-step progress bar** for a "**Project Wizard**" process. The steps are numbered and labeled below circular icons. Step **1**, labeled "**Create Project**," is highlighted with a blue circle, indicating it is the current step. Step **2** is labeled "**Publication Settings**," and Step **3** is labeled "**Create Role(s)**." Steps 2 and 3 are grey, indicating they are pending.


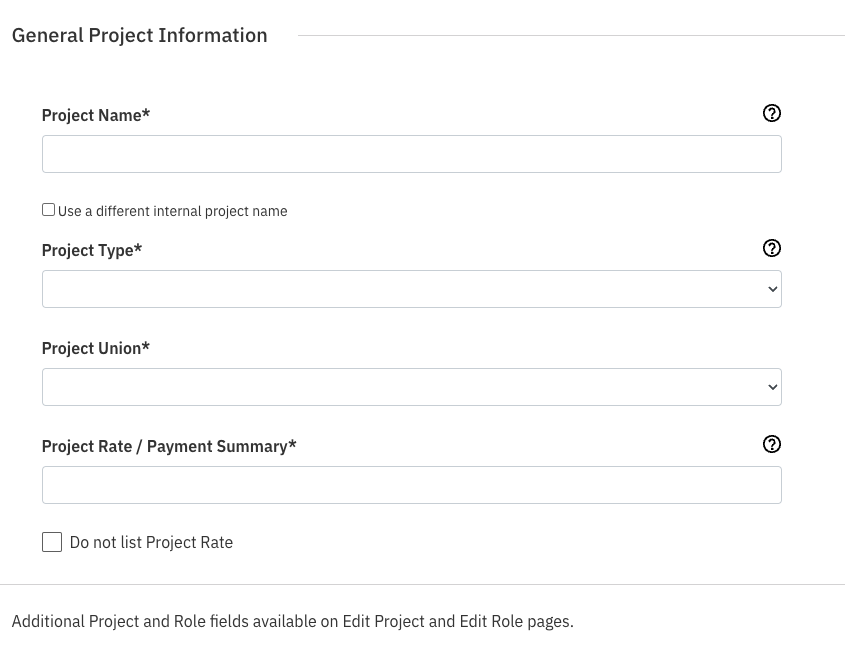
Step 1: Create Project

In this first step, you will establish the foundation of your project.

  • Fill out the basic information, including Name, Type, Union, and Rate.

  • Note: You can always go back and edit or add more project details later if needed.

Alt text: A form section titled "**General Project Information**" from a project creation wizard. The form contains several required fields, indicated by an asterisk (*), including: * **Project Name*** (text input field) with a checkbox option below it to "Use a different internal project name." * **Project Type*** (dropdown menu). * **Project Union*** (dropdown menu). * **Project Rate / Payment Summary*** (text input field) with a checkbox option below it to "Do not list Project Rate." A small question mark icon (help text indicator) is present next to the labels for Project Name, Project Type, and Project Rate / Payment Summary. A line of text at the bottom says: "Additional Project and Role fields available on Edit Project and Edit Role pages."


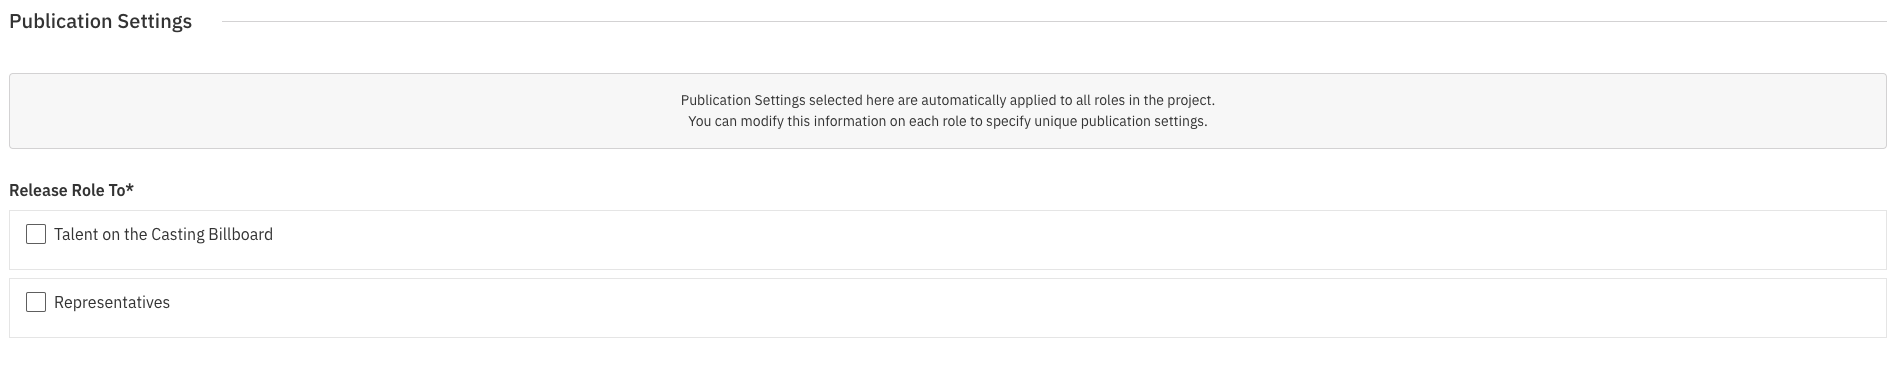
Step 2: Publication Settings

The second step moves directly to publication settings.

  • Choose who the project is released to.

  • Select where the project will be released.

Step 2 Publication Settings screen


Step 3: Create Role(s)

 The final step involves filling out the specific role information.

  1. Complete all required fields on the role form (indicated by an asterisk). This includes:

    • Role Name

    • Role Type

    • Role Rate

    • Demographic Features

    • Role Description

    • Submission Requirements

  2. Once the necessary information is filled out, select one of the three options at the bottom of the screen:

    • Back

    • Save and Go to Project Overview

    • Save and Add Another Role

Alt text: A row of three action buttons for navigation and saving within a multi-step project creation wizard. The buttons are, from left to right: a white, outlined button labeled "**Back**"; a white, outlined button labeled "**Save and Go to Project Overview**"; and a solid blue button labeled "**Save and Add Another Role**."

Important: If you are on Step 3 and have filled out role information, navigating back to Step 2 will clear the role information you just entered.


Was this article helpful?

Sorry about that! Care to tell us more?

Thanks for the feedback!

There was an issue submitting your feedback
Please check your connection and try again.