
CASTING DIRECTORS: How do I create and manage Requests?
This article explains the Requests feature and how to collect information or media from talent. It is designed to ask specific questions or request self-tapes directly within a project.
Creating a New Request
Requests allow you to quickly collect necessary information about talent within your project. To create a new request, follow these steps:
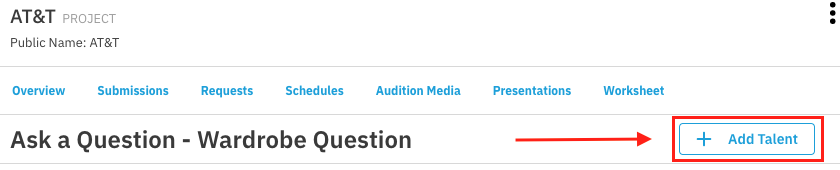
Click on the Project Name.
Click on Requests below the project name.
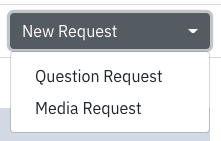
Click on New Request.

Choose Question Request or Media Request.
Understanding Request Types
If you selected Question Request:
A new page will appear with a form.
Fill out the request name and your question.
You can include sides previously uploaded to the talent's role.
Add your talent
Once the form is filled out, click Send Request.
Note: This is best used to check availability or get experience details.
If you selected Media Request:
A new page will appear to fill out the request name.
Select media types (video, audio, photo, or PDF).
Fill out the Media Instructions field.
Add your talent
Once the form is filled out, click Send Request.
Note: Talent can upload up to 10 pieces of media per request. Video/Audio adds directly to the Audition Media section.
Helpful Tip: Both request types allow you to include a message to representatives which will not be visible to talent.
Adding Talent to a Request
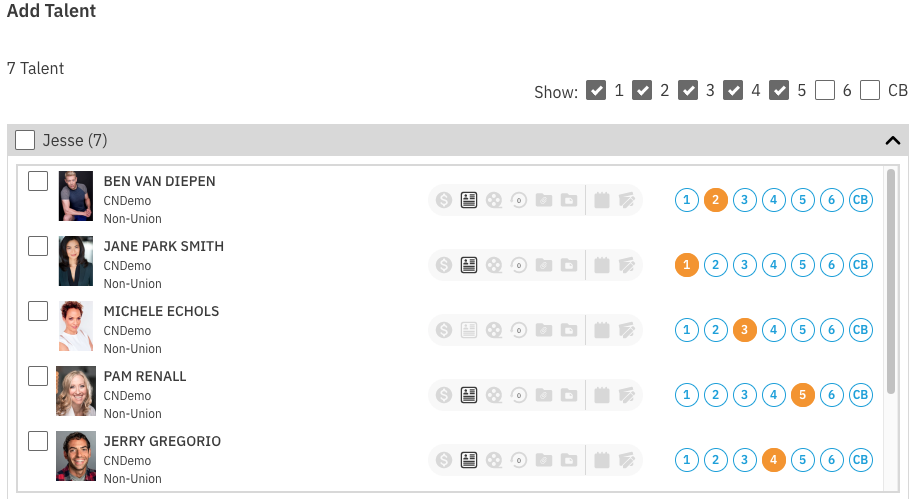
While creating your request, you will see an option to +Add Talent.
This opens a list of all selected talent in the project.
It includes their selection number.
You can filter talent by their selection tag.
Clicking the checkbox next to the role name adds all talent (or all filtered talent) to the role.
Opening the role dropdown will display all selected talent for that role allowing you to use the checkbox next to specific talent. This allows you to select them individually then adding your selections in bulk.
Editing and Cloning Media Requests
If you need to make changes to a request, you may be able to do so without cloning. However, major changes require cloning the request.
Updates You Can Make WITHOUT Cloning
Change the due date.
Add or update sides to a role (this automatically updates the sides on the request).
Send messages to New and Pending Requests to share updates.
How to Clone a Request
If you need to edit a sent Media Request (e.g., you asked for video but meant to ask for audio), you must clone it.
Important: We recommend you first CANCEL the original request. This prevents talent from responding to the incorrect request. You can include a cancellation message letting them know a new request is coming.
Click on the Project Name.
Click on Requests below the project name.
Click on the Original Request you want to clone.
Select CLONE REQUEST.

Select which talent you would like to include in the new request (All, Sent & Pending, Confirmed, Declined, Completed).
Select CLONE.
Edit any information or add/remove talent as needed.
Select Send Cloned Request.
Note: Any media uploaded to the original request will not appear in the cloned request session.
Watch this video for a walkthrough of the process:
How do I view responses to my requests?
For Project Creators: Media can be viewed within the request itself
Click Requests located directly under your project name.
Select the name of the request you'd like to review
Responses that has been uploaded by talent will appear on the right across from their profiles.
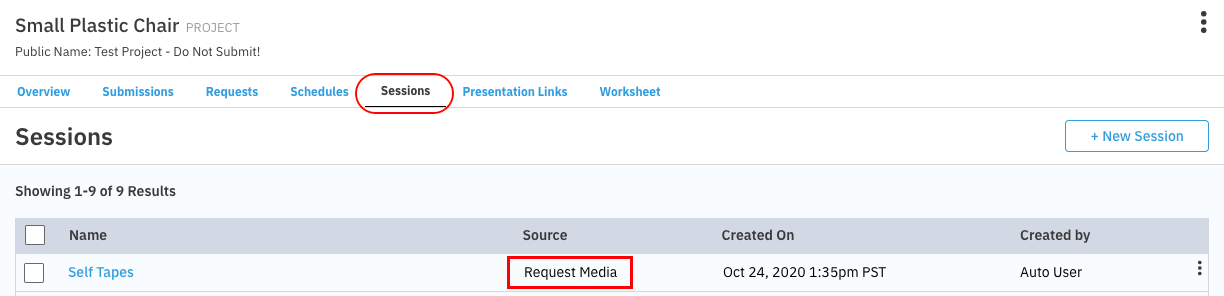
For Enterprise Casting Directors: Media can be viewed within the request itself, but you also find responses to any media request under the Sessions section of your account.
Sessions is located directly under your project name
You’ll see Request Media listed as the source, followed by the date, and the name of the person who created the request.
Selecting the name of your request will open the Groups page, displaying the talent that have uploaded their self taped media.
Sending Media Requests with Questions
You do not have the option to send both types of requests at the same time. However, if you would like to request media, as well as ask talent a question, we recommend sending a Media Request.
You can use the following method to get the information you need:
Add your question to the Media Instructions field.
Talent have the opportunity to include a note with their media submission which can be used to answer any questions or add additional information.
Sending a Reminder
To send a reminder to talent:
Click Requests below the project name.
Click on the Question or Media request.
Click on Send Request at the bottom right of your screen.

Once the pop-up appears, select New and Pending Requests and enter a note (optional).
Click Send.
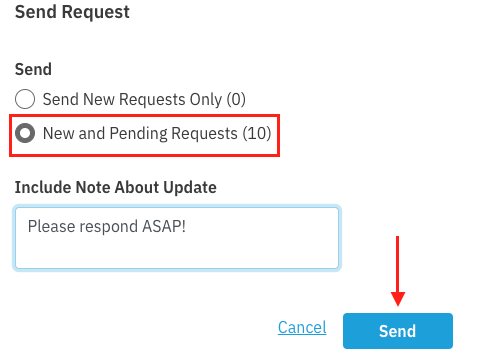
This will resend the request to all talent who have not responded to the request.